Weekly tips, affirmations, and small actions to feel your best.

Shrimp Recipes Everyone On The Keto Diet Should Try

Keto is all the rage right now. It seems that everyone is trying out the ketogenic lifestyle, hoping to slim down, gain more energy, and improve health in general. If you haven’t been hiding under a rock lately, you’ve likely heard about the keto diet movement and what it can do for your health. Just in case you’re out of the loop, we’ll provide you with an overview of the keto lifestyle and then get you started with some fantastic shrimp recipes to keep you and your waistline in check without sacrificing taste.

What is the ketogenic lifestyle, anyway?

Ketogenic eating is another term for a specific “low-carb” diet. The idea of eating keto is to get the majority of your calories from protein and fat. Those replace carbohydrates.

Eating a low-carb diet puts the body into a state of ketosis, where your body switches from burning carbs and simple sugars to fat stores in the body. Your body runs more efficiently, you have longer sustainable energy, and your cravings for sugar and carbs virtually disappear.

Why shrimp?

Shrimp is a low-fat, tasty option for eating keto, and these shrimp recipes are bound to become your favorite staples for staying on a low-carb lifestyle toward better health. shrimp have many health benefits, including:

  • They are low-calorie and nutrient-dense
  • Shrimp provides a rich source of iodine, which we need for proper thyroid function
  • They contain powerful antioxidants
  • They are high in “good” cholesterol and are heart-healthy

Try out these shrimp recipes to round our your ketogenic recipe arsenal, and get ready for some serious taste and flavor.  Note that in preparation, you’ll want to add your fats!

Here are our top 10 picks for ketogenic shrimp recipes you’ll love:

shrimp and keto diet

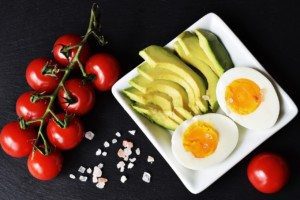
Ready to eat shrimp and other keto foods? Learn more about how to get started.

1. Lemon garlic shrimp

Your weeknights are most likely hectic—this is one of our favorite shrimp recipes that you can whip on the fly; all you need to do is pick up shrimp, add a beautiful green salad, or some pasta, and voila! Dinner. Served.

Ingredients:

  • 2 Tbsp butter, divided
  • 1 Tbsp extra virgin olive oil
  • 1 lb medium shrimp, peeled and deveined
  • One lemon thinly sliced, plus the juice of one lemon
  • Three cloves minced garlic
  • 1 tsp crushed red pepper flakes
  • kosher salt
  • 2 Tbsp dry white wine or water
  • Freshly chopped parsley for garnish

Directions:

In a large skillet over medium heat, melt 1 Tbsp butter and olive oil. Add shrimp, lemon slices, garlic, and red pepper flakes. Cook and season with salt, occasionally stirring until shrimp are pink. Remove from heat and stir in remaining butter, lemon juice, white wine, or water. Season with salt and garnish with parsley just before serving.

2. Garlicky shrimp zucchini pasta

Do you miss pasta? This is one of those shrimp recipes that you can go to when you’re feeling tempted to call Olive Garden. Delicious, light shrimp, and zucchini noodles form a symbiotic relationship that rivals the best pasta dish around.

Ingredients:

  • 3 Tbsp butter, divided
  • 1 lb medium shrimp, peeled and deveined
  • Kosher salt
  • Three cloves minced garlic
  • 3/4 cup heavy cream
  • 1/2 cup grated parmesan
  • 1 cup halved cherry tomatoes
  • 3 Tbsp chopped parsley
  • Three large zucchini, spiraled (about 4 cups noodles)

Directions:

In a large skillet over medium heat, melt 1 Tbsp butter. Add shrimp and season with salt and pepper. Cook until shrimp is pink and opaque on each side, about three minutes. Transfer to a large plate.

Melt remaining butter in a skillet and add minced garlic. Cook for 1 minute, then add heavy cream. Bring to a simmer, add tomatoes, parmesan, and parsley. Simmer till vegetables soften, and sauce thickens about 2 minutes.

Return shrimp to skillet and add zucchini noodles; toss to combine and serve immediately.

3. Shrimp and zucchini boats

When you are craving something more substantial, zucchini boats are a great option. Low fat and extremely tasty, this is one of our favorite shrimp recipes that are good at any time of day or night.

Ingredients:

  • Four large zucchini halved and scooped out
  • 1 Tbsp extra virgin olive oil
  • 1 tsp thyme leaves
  • 2 Tbsp butter
  • 3/4 lb jumbo shrimp, peeled and deveined
  • Two chopped tomatoes
  • Three cloves minced garlic
  • 1/4 cup heavy cream
  • 1/4 c grated parmesan
  • Juice of 1/2 lemon
  • 1 cup shredded mozzarella
  • Fresh parsley for garnish

Directions:

Preheat oven to 350. Score zucchini and scoop out insides to use later. Place zucchini boats in a large baking dish and drizzle with olive oil. Season with salt, pepper, and thyme. Bake until tender, about 20 minutes.

In a large skillet over medium heat, melt 2 Tbsp butter. Add shrimp and season with salt and pepper. Cook until pink and heated through, about 4 minutes. Remove from heat, cool, and cut into bite-sized pieces. Return shrimp to skillet and add chopped zucchini, tomatoes, and garlic and cook till fragrant. Add cream, parmesan, and lemon juice; cook for 3 minutes, or till sauce is reduced.

Fill zucchini boats with shrimp mixture and top with mozzarella cheese. Bake till cheese is bubbly, about 10 minutes. Garnish with additional parmesan and parsley.

4. Buffalo shrimp lettuce wraps

Who needs bar food anymore? This is one of the best shrimp recipes for satisfying that urge to snack. Go ahead; load up on these beauties—-they are delicious and nutritious!

Ingredients:

  • 1/4 Tbsp butter
  • Two minced garlic cloves
  • 1/4 cup Frank’s hot sauce
  • 1 Tbsp extra virgin olive oil
  • 1 lb shrimp, peeled and deveined
  • Kosher salt and freshly ground black pepper
  • One head romaine, leaves removed
  • 1/4 red onion, finely chopped
  • One celery rib, sliced thin
  • 1/2 c bleu cheese, crumbled

Directions:

Make buffalo sauce. In a small saucepan over medium heat, melt butter. Add garlic and cook till fragrant. Add hot sauce and stir to combine. Turn to low and let sit while you prepare the shrimp.

In a large skillet over medium heat, add oil. Add shrimp and season with salt and pepper, cook till pink and opaque, about 4 minutes. Turn off the heat and add buffalo sauce, tossing to coat. Assemble the wraps–add about two large scoops of buffalo mixture to romaine lettuce leaves, top with additional sauce and bleu cheese. Serve with your favorite veggie sticks.

5. Spicy shrimp stuffed avocados

Who needs a sandwich for lunch? The combination of creamy avocado and spicy shrimp makes it one of the most delicious shrimp recipes you could serve up for any light meal.

Ingredients:

  • 1 Tbsp extra virgin olive oil
  • One pound of shrimp, peeled and deveined
  • 1 tsp paprika
  • Kosher salt and freshly ground black pepper
  • 1/3 cup mayonnaise
  • 2 Tbsp hot sauce
  • Juice of 1/2 lime
  • 3 avocados, halved and pits removed
  • 1/2 small red onion, finely chopped
  • 2 green onions, thinly sliced

Directions:

In a medium skillet over medium heat, add oil. Add shrimp and season with salt and pepper. Cook shrimp until pink and opaque, about 3-4 minutes. Add paprika and season with salt and pepper; cool. In a small bowl, combine mayonnaise, hot sauce, and lime juice.

Scoop the flesh out of the avocados and dice into cubes. Add shrimp, red onion, and avocado to a bowl and toss to combine. Pour spicy mayo over the mixture and gently stir till combined; season with salt and pepper. Divide the mixture between avocado shells and garnish with green onion slices.

shrimp and food prep for keto

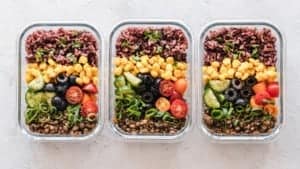
Try these keto food prep hacks to help you stick to the plan.

6. Cajun shrimp kabobs

Who doesn’t love grilled food? This light yet meaty fare will keep you on track with your diet while providing you a delicious meal. Pair with a delightful green salad for any backyard occasion.

Ingredients:

  • 1 lb shrimp
  • 2 Tbsp olive oil
  • 1 tsp kosher salt
  • 1 tsp cayenne
  • One tsp paprika
  • One tsp garlic powder
  • 1 tsp onion powder
  • 1 tsp oregano
  • Two lemons, sliced crosswise

Directions:

Preheat grill to medium-high heat. Make cajun spice mix by combining salt, cayenne, paprika, garlic powder, onion powder, and oregano in a small bowl. Stir with a fork till well mixed. In a medium bowl, toss shrimp in olive oil. Add spice mixture and toss till shrimp are evenly coated. Thread shrimp and lemon onto metal skewers, alternating as you go. Grill on medium-high heat for 4-5 minutes, or till shrimp are pink and lemon slices are slightly charred.

7. Keto breaded shrimp

This is the king of all shrimp recipes—-powerfully crunchy pork rinds give your shrimp a delightful texture, while a flavorful aioli rounds out the dish and leaves you wishing you had more on your plate.

Ingredients:

  • Cooking spray
  • 6 oz pork rinds
  • 1/4 cup grated parmesan
  • 1 tsp chili powder
  • 1/2 tsp paprika
  • 1/2 tsp garlic powder
  • 1 tsp dried oregano
  • Kosher salt
  • Two eggs, lightly beaten
  • Freshly ground black pepper
  • One pound of shrimp, peeled and deveined
  • SAUCE AND GARNISH
  • 1/2 cup mayonnaise or sour cream
  • Juice of 1/2 lemon
  • Dash hot sauce
  • Freshly chopped parsley

Directions:

Preheat oven to 450 degrees. Grease a large rimmed baking sheet with cooking spray or line with parchment paper. In a food processor, grind pork rinds until they resemble fine crumbs. Transfer to a medium bowl and whisk in parmesan cheese, spices, and herbs. Season with salt and pepper.

Pour beaten eggs into a separate bowl. Dredge shrimp in egg mixture, then place in pork rind mixture and toss to coat thoroughly. Place breaded shrimp on the prepared baking pan and bake until golden and crispy, for 10-12 minutes.

Make aioli sauce. Whisk together mayo, lemon juice, and hot sauce, season with salt and pepper to taste. Garnish with chopped parsley and serve shrimp with sauce on the side.

8. Keto shrimp pad thai

When the craving for a good Asian dish strikes, it’s hard to ignore. This is one of our favorite shrimp recipes that delivers all the flavor with very few carbs. Slurp away; it’s culturally appropriate!

Ingredients:

  • 1 pkg shirataki noodles
  • 1 1/2 Tbsp fish sauce
  • 2 Tbsp coconut aminos
  • 2 Tbsp artificial sweetener
  • 1/4 tsp blackstrap molasses
  • 1/4 tsp red pepper flakes
  • 2 Tbsp fresh lime juice
  • 2 Tbsp coconut oil
  • Two cloves minced garlic
  • 1 lb fresh shrimp
  • 2 eggs, lightly beaten
  • bean sprouts
  • 3 green onions, finely sliced
  • 1/2 cup fresh cilantro leaves, torn
  • unsalted chopped peanuts

Directions:

Prepare shirataki noodles according to package directions; set aside.

In a small bowl, whisk together fish sauce, coconut aminos, sweetener, and red pepper flakes. Add lime juice to taste.

Heat oil in a skillet or pan over medium-high heat. Add garlic and saute for two minutes. Add shrimp to pan and cook for about 5 minutes, or until shrimp is pink. Pile the shrimp against one side of the pan. Pour lightly beaten eggs into the pan and cook till they form a soft scramble. Pour in the prepared sauce and mix till eggs and shrimp are evenly coated. Add noodles and sprouts and heat through, about 2-3 minutes. Garnish with green onions, cilantro, and peanuts.

9. Cauliflower grits with gouda cheese and blackened shrimp

Want a little flavor from the bayou? This is one of those perfect shrimp recipes that provides comfort food satisfaction with a kick of flavor.

Ingredients:

Blackening mix
  • 2 Tbsp smoked paprika
  • 1 Tbsp sweet paprika
  • 1 Tbsp garlic powder
  • One Tbsp onion powder
  • 1 Tbsp freshly ground black pepper
  • 1 1/2 tsp dry mustard
  • 2 tsp dried thyme
  • 1 1/2 tsp dried oregano
  • One tsp cayenne pepper
  • One tsp kosher salt
Cauliflower grits
  • 1 large head cauliflower
  • 2 Tbsp unsalted butter
  • 1 bunch scallions
  • 1 cup chicken broth
  • 4 oz cream cheese at room temperature
  • 1 cup shredded Gouda cheese
  • salt and pepper to taste
  • 1/4 cup chopped parsley
  • 3 Tbsp olive oil
  • 1 pound jumbo shrimp

Directions:

Combine all blackening seasoning ingredients in a small bowl; set aside. In a food processor, pulse cauliflower until it resembles rice. Heat butter in a shallow saucepan; add scallions and cook till tender. Add chicken broth and bring to a boil. Whisk in cream cheese until it is incorporated with the rest of the sauce ingredients. Add cauliflower and cook 3-5 minutes, or till it softens. Add in Gouda cheese and stir till melted; season with salt and pepper and garnish with fresh parsley.

Generously coat shrimp with the blackening seasoning. Heat olive oil in a large skillet and cook shrimp till pink and no longer opaque, about 3-4 minutes. Serve atop a pile of steaming, delicious grits.

cauliflower

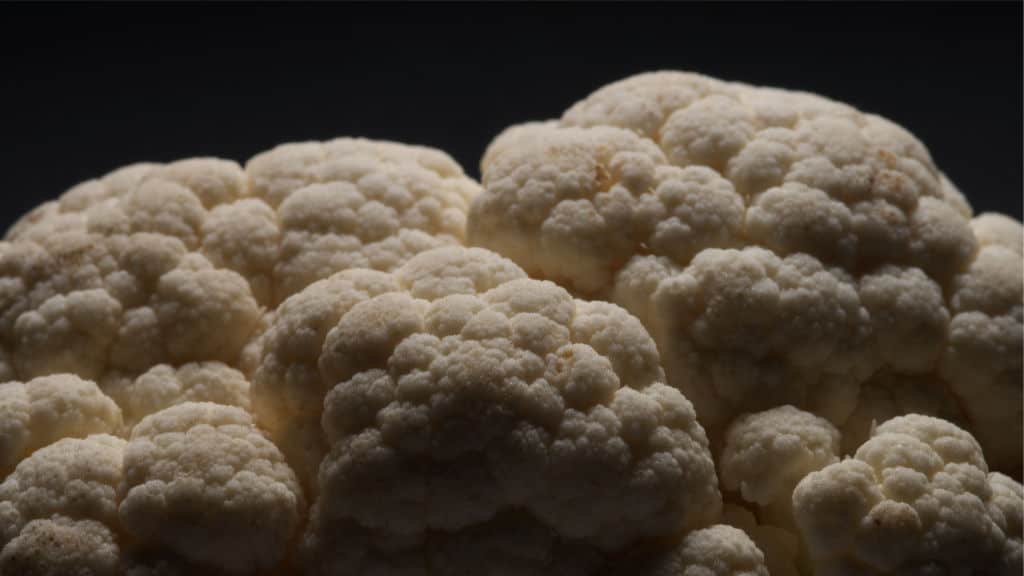
Cauliflower is more versatile than you think! Read to learn why.

10. Keto surf and turf

Here is a classic keto twist on a delicious dish; this is perfect for an intimate evening in or a dinner party with friends who are all on the keto track. Serve it up for an impressively flavorful evening:

Ingredients:

  • 3/4 tsp salt
  • 1 tsp black pepper
  • 1/2 tsp garlic powder
  • 1/2 tsp onion powder
  • One tsp paprika
  • 1/2 tsp mustard powder
  • 1/4 tsp thyme
  • 1/4 tsp crushed red pepper
  • Two 8-oz sirloin tip steaks
  • Six jumbo shrimp, peeled and deveined
  • 3 tsp lemon juice
  • 2 Tbsp butter
  • 1/2 tsp freshly minced garlic

Directions:

In a small bowl, combine salt, pepper, garlic and onion powders, paprika, mustard powder, thyme, and red pepper. Liberally season both sides of each steak and all shrimp with seasoning. Heat olive oil in a pan over medium-high heat. Sear, then cook both steaks to the desired doneness, about 5-6 minutes each side. As you flip steaks, squeeze lemon juice over them to infuse flavor and create steam.

Transfer steaks to a serving dish and turn the heat down to medium on your pan. Place shrimp in the pan and cook about 2 minutes per side, drizzling with lemon juice during cooking similar to the steaks. Transfer shrimp to your serving dish as well.

Turn heat down to low on your pan, add butter and garlic to the sauce to deglaze and combine. Add the remaining 2 Tbsp of lemon juice to the pan and heat for 60 seconds. Pour lemon garlic butter sauce over steak and shrimp, serve with your favorite keto side dish.

shrimp egg keto recipes

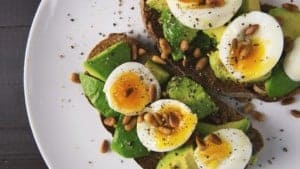
Want more keto recipes? Don’t overlook eggs!

Final Thoughts on Making These Scrumptious Shrimp Keto Recipes

You’ve got some delicious days ahead of you; serving up these simple and easy shrimp recipes will keep you on track and keep you from getting bored in the kitchen. Bon Apetit!

Oncologist Explains the Adverse Side Effects of Chemotherapy

Cancer is a terrible disease, and chemotherapy may have adverse side effects on patients.

This disease is widespread. Indeed, the American Cancer Society reported that in 2019 alone, over 1 million people perished from this disease. Furthermore, they reported more than 600,000 newly diagnosed cases of cancer.

Chemotherapy is the primary treatment that many oncologists recommend. What patients might not understand is the potential impact of this therapy on the human body.  There can be many adverse side effects of chemotherapy, depending on the type utilized. An oncologist explains how this treatment works and discusses the possible risks.

What is Chemotherapy? And How Does it Work?

Chemotherapy is usually the first course of action after a doctor diagnoses cancer. These drugs kill cancer cells that rapidly divide. While the purpose behind using chemotherapy is to kill cancer cells, they do not discriminate. In fact, they destroy healthy cells, as well.

Most chemo treatment is given intravenously, but there are some forms of chemo that are now available in pill form.

Although the pill form of the treatment isn’t as popular, it is certainly more comfortable for those who suffer from specific types of cancer.

sound treatment instead of chemoSide Effects of Chemotherapy

Some of the most common adverse side effects of chemo treatment include the following:

  • Nausea and vomiting
  • Changes to appetite
  • Constipation
  • Anemia
  • Hair Loss
  • Anemia
  • Fatigue
  • Easy bruising and bleeding

Although these unwanted side effects are some of the most common, they can be problematic for the individual who is receiving treatment.

An oncologist explains the adverse side effects of this conventional approach to treating cancer.

Why Does Chemotherapy Cause Adverse Side Effects on the Body?

Chemo treatment’s purpose is to kill cancer cells that are growing at a rapid pace. Along with these dangerous cells, the chemicals also destroy the body’s healthy cells in the process.

The death of those healthy cells is what causes you to be sick. As those robust cells die, your body becomes depleted. Thus, your immune system weakens.

Let’s take a more in-depth look at the side effects of chemo.

1. Nausea and vomiting.

Nausea and vomiting have always associated with the flu or stomach viruses. But for cancer patients, it also links to their chemo treatments. In fact, one report states that this adverse impact occurs in a staggering 80 percent of cancer patients.

That sick feeling in the stomach that is undeniable, and it comes on as the chemicals used for treatment cause imbalances in the body. The inability to eat and the sick feeling in the pit of the stomach make patients feel nauseated. Vomiting is just a way for the toxins to exit the system.

The danger arises because the continual cycle of chemo treatment, nausea, and vomiting triggers lowered potassium and dehydration. These issues leave cancer patients more prone to heart problems, pneumonia, flu, and viral infections.

2. Change to appetite.

Most patients express a lack of interest in eating post-treatment. Some patients feel that  “chemo days” as so exhausting they lack the energy to lift a fork for days afterward. Additionally, a change in appetite may also occur with treatment because of the change of taste in your mouth. This change to the taste buds is quite usual with treatment for cancer.

Why is this loss of appetite so dangerous? According to research revealed by the Canadian Cancer Society, this side effect triggers rapid, unhealthy weight loss and may contribute to malnutrition. That scenario poses a danger to the patient’s ability to bounce back once treatments end.

3. Fatigue.

A lack of energy is quite usual with cancer treatment. When healthy cells are dying, this causes a significant strain on a patient’s energy levels. Not only do patients lack the energy to go about their day, but the fatigue also disrupts the patient’s everyday life.

This fatigue occurs because of the destruction of healthy cells along with the dangerous, cancerous ones. The body focuses its energy on cell remanufacturing, leaving the patient feeling depleted. According to one report, the human body might take as long as five years to manufacture cells to replace those lost in chemotherapy. 

The same report goes on to offer a natural energy booster that can help patients get back to feeling better, faster–ginseng.

4. Losing hair.

Hair loss is one of the most common side effects that the world associates with cancer treatment. Doctors call this condition Chemotherapy-Induced Alopecia or CIA.  CIA is relatively common. However, not every patient will deal with it at all.

Hair loss occurs because there are hundreds of thousands of blood vessels around hair follicles which fuel the growth of hair. Although cells multiply, they grow faster here than they do anywhere else in the body.

Not only is the loss of hair uncomfortable, think sunburns or itchy scalp, but it psychologically damages the patient. Every day, the person looks in the mirror at the indelible reminder of cancer.

quotes for cancer survivors5. Irregular bowel movements.

Chemo treatment literally changes everything, including the patient’s gut health. Along with cellular damage to the lining of the digestive organs comes the previously mentioned appetite loss.

These changes precipitate constipation, hardening, or loosening of the stools, diarrhea, and vomiting.

Over time, this irregularity could cause irregular heartbeat, seizures, or respiratory distress.

6. Anemia.

Anemia, an iron deficiency links to chemotherapy. The healthy growth of red blood cells is essential for energy reserves. Those who are unable to get this energy reserve will discover that anemia comes on easily.

One report points to this condition as the cause of some of the cancer-related fatigue. Additionally, it suggests that anemia might be the cause of nausea and appetite loss in some patients.

7. Infection (Post Cancer Treatment).

Did you know that some may face infections long after the treatment is over? New research has shown that treatment for cancer can cause disease or problems fighting off infection long after treatment has ended. This weakening is because the immune system may not be as robust as it once was. It takes time to build up the immune system after chemo treatments are over.

“You beat cancer by how you live, why you live, and in the manner in which you live.” Stuart Scott

mammogram

Radiologists explain the effectiveness of a mammogram in beating breast cancer.

Managing the Adverse Effects of Chemo

Chemo ravages cancer and healthy cells. While about 80 percent of people experience adverse side effects, there are ways for patients to minimize their impact.

According to research, some natural ways a cancer patient can reduce the impact of chemotherapy include the following:

Yoga

Yoga helps patients restore a more positive mindset as they fight their disease. It also helps to minimize inflammation that may occur.

Herbal remedies

The same report mentions herbal remedies. In addition to ginseng mentioned earlier, ginger may quell nausea that arrives after a chemotherapy treatment.

Massage therapy

Getting a massage can help a patient feel better physically and mentally. All patients should make self-care a priority during treatments, and this is a real treat for the body.

Mindfulness Meditation

Patients who learn to meditate during chemotherapy treatments may improve their mood, sleep better, feel less fatigued, and stave off nausea.

Recap

Along with cancer treatment comes some adverse side effects. Most of these side effects are due to the fact that during chemotherapy treatment, healthy cells die also. When healthy cells become damaged, the body fights to overcome this and rebuild healthy tissue and new cells to fight disease.

The fight to overcome damaged cells and tissue will cause the body to feel fatigued. There are several natural remedies that prove to decrease the severity of the adverse impacts–or even eliminate them altogether in some people.

chemotherapy

Learn how this woman beat stage four breast cancer in two months–without chemo!

Final Thoughts: Is chemotherapy a curse or a cure?

Cancer is a terrible disease that destroys millions of lives each year. Furthermore, several thousand more receive a new diagnosis each year.

And the seemingly best treatment options that oncologists can offer–surgery and chemotherapy–are invasive. More importantly, they cause risks and disrupt the daily life of cancer patients. Even as a patient should gear up to literally “fight for their life,” they receive surgical and chemical interventions that knock out their zest for life.

Scientists conducted a tremendous amount of cancer research over the years, but new research continues. Cancer research will always continue. It seems that there is so much to learn and that researchers have only scratched the surface.

It is essential that all cancer treatment be taken seriously, and that research continues to help save lives. There are so many different types of cancer, and cancer treatment will vary with each patient.

But many patients know that the cure is also a curse. While it will kill off cancer that invades their bodies, it will weaken them for the near future. Complementary care like yoga, massage therapy, and meditation can help ease the symptoms of chemotherapy. In the meantime, researchers continue to look for a less invasive cure for cancer.

Orthopedic Doctors Explain How Glucosamine Eases Arthritis

For years, glucosamine enjoyed a highly-desired status among go-to for gym-goers. That’s because this supplement aids those who need a little bit of help recovering from long, strenuous workouts.

Commonly paired with chondroitin, a dietary supplement that helps accomplish the following:

  • Healthy cartilage
  • Reduce joint pain
  • Eases inflammation
  • Other forms of post-workout discomfort.

The combination of glucosamine and chondroitin is so popular that manufacturers sell it as a singular supplement product. This multi-use packaging means that you don’t have to buy one bottle of each to derive these benefits. It is also worth noting that a 2018-study published by the American Family Physician revealed that the U.S. consumer market for the combined supplement has an estimated valuation of $810 million.

Doctors also know that glucosamine, even when used alone, can also benefit those struggling with painful arthritis symptoms.

WHY GLUCOSAMINE IS BECOMING THE MUST-HAVE SUPPLEMENT

Glucosamine (D-glucosamine) is a naturally-occurring compound found in cartilage, the hard tissue that helps cushion your joints. Without this compound, jumping, running, and even walking would be extremely painful. Although the human body is capable of producing D-glucosamine naturally, it produces less of it as we age. As a result, many individuals, particularly those struggling with joint pain, will turn to supplements that contain this compound to relieve pain and improve mobility. The same applies to athletes and avid gym-goers as well. And when you add in the fact that these supplements are well-researched, it is not too hard to see why they have captured the attention of so many consumers.

collagen deficiencyWHAT YOU MAY NOT HAVE KNOWN ABOUT D-GLUCOSAMINE

A look at ongoing research shows that D-glucosamine remains one of the most studied supplements on the market today, with well over 20 randomized controlled trials involving more than 2,500 study participants. These trials revealed that D-glucosamine was effective in slowing the progression of anatomic joint structure changes often associated with knee osteoarthritis. Further, these results came with little to no side effects. Of course, the joint and mobility benefits did not end there as researchers and scientists involved in these trials also found that D-glucosamine effectively controlled the progression of symptoms that are usually par for the course when it comes to knee osteoarthritis.

WHAT YOU SHOULD KNOW ABOUT ARTHRITIS PAIN

We will detail how a D-glucosamine supplement regimen can help resolve pain and mobility issues associated with arthritis. However, it is important to note the three common types of arthritis, including the following:

Rheumatoid arthritis

This form of arthritis is considered an autoimmune disorder and occurs when the immune system begins attacking the body, namely the joints. Individuals with this autoimmune disorder often experience severe pain, swelling, and stiffness in numerous joints. While the epidemiology of rheumatoid arthritis is not fully understood, researchers, scientists, and many physicians believe that it is the result of the immune system becoming confused, typically following an infection or virus, and attacking healthy tissues in the body. In any event, individuals with rheumatoid arthritis typically find completing routine tasks, such as walking, driving, or even opening a jar, exceedingly difficult.

Psoriatic arthritis

This form of arthritis usually affects those between the ages of 30 and 50. Individuals with psoriatic arthritis will usually develop areas of patchy, raised skin, which can form on nearly any part of the body. These skin conditions are often made worse by a burning or itching sensation. In most cases, the discomfort stops here; however, for about a third of the people with psoriatic arthritis, these symptoms are accompanied by swelling that affects the fingers and toes. And over time, the swelling will start to impact joint health in these specific body parts. Those with this form of arthritis may find driving and completing tasks that require the use of their fingers difficult.

Osteoarthritis

This form of arthritis is by far the most common; according to News Medical Life Sciences, an online, open-access resource for insightful medical information, osteoarthritis affects the lives of 27 million people in America, surpassing that of rheumatoid arthritis, which affects roughly 1.3 million Americans. While osteoarthritis is usually a byproduct of getting older, the condition is also common among those who are obese or overweight. Osteoarthritis causes inflammation and a loss of cartilage, both of which can impact joint mobility, particularly in the knees, hips, feet, and spine.

Because D-glucosamine supplements are not as effective in resolving symptoms caused by certain types of arthritis, it helps to know the difference between these three common forms of arthritis.

glucosamine for arthritis pain

D-GLUCOSAMINE AND OSTEOARTHRITIS

First and foremost, there are many variations of D-glucosamine supplements on the market. Some products contain sulfate, hydrochloride, or N-acetyl. That said, the go-to for those seeking relief from pain and other arthritis-related symptoms is D-glucosamine sulfate. And this is especially true when it comes to osteoarthritis. In a study published by the National Institutes of Health, which included 318 study participants, researchers concluded that those who took 1,500 mg of D-glucosamine sulfate per day achieved the same level of relief from arthritis-related pain symptoms as those who took 3 grams of acetaminophen three times per day.

D-GLUCOSAMINE AND RHEUMATOID ARTHRITIS

Because rheumatoid arthritis is an autoimmune disorder, D-glucosamine supplements may not be quite as effective in relieving stiffness, pain, and inflammation. However, studies show that those who are struggling with the condition can still benefit from taking them. To help put this into perspective, a study published by Healthline, an online resource for health information based in San Francisco, CA, revealed that study participants diagnosed with rheumatoid arthritis who took 1,500 mg of glucosamine hydrochloride per day for three months saw noticeable improvements in their symptoms compared to those who took a placebo.

D-GLUCOSAMINE AND PSORIATIC ARTHRITIS

When it comes to psoriatic arthritis, there is little scientific evidence to suggest that taking D-glucosamine supplements can provide relief from arthritis symptoms.

However, most scientists, researchers, and even rheumatologists believe that in a holistic approach. That combines a healthy diet, exercise, and D-glucosamine supplements. This combination may give individuals a small amount of relief from their symptoms.

psoriatic arthritis

HOW DOES D-GLUCOSAMINE WORK IN THE BODY?

Although the mechanics behind how D-glucosamine works when it comes to easing arthritis-related symptoms is not fully understood, they do boost cartilage production in the body. And the more cartilage you have to cushion your bones and joints, the less severe your arthritis symptoms. Of course, rheumatoid arthritis is the exception in this regard. All in all, D-glucosamine helps boost cartilage production and minimizes the deterioration of existing cartilage, both of which keeps joints healthy and painful arthritis symptoms at bay.

IS D-GLUCOSAMINE SAFE?

As with any supplement, D-glucosamine is not regulated by the Food and Drug Administration. Therefore, those who choose to take this supplement to ease arthritis pain, improve joint mobility, or a combination of the two should do their own research and choose a brand that best meets their health and wellness needs.

Also, note that most studies only discuss D-glucosamine in the treatment of arthritis. They do not cover D-glucosamine combined with chondroitin. Furthermore, there are other variations of D-glucosamine on the market. However, the sulfate variant is the one scientists study the most for the treatment of arthritis. That aside, D-glucosamine supplements can cause side effects, especially when taken incorrectly. Some of these side effects include the following:

  • Constipation
  • Diarrhea
  • Drowsiness
  • Headaches
  • Heartburn
  • Nausea
  • Irritated skin
  • Stomach upset

CONTRAINDICATIONS ASSOCIATED WITH D-GLUCOSAMINE

Also, note that D-glucosamine supplements contraindicate with certain medications. In other words, they may cause an adverse reaction when taken together. Some of these medications include:

Warfarin

As a prescription anticoagulant, doctors issue warfarin prescriptions when it comes to resolving blood clots. However, if taken with D-glucosamine supplements, it can lead to excessive bleeding.

Acetaminophen

Acetaminophen is yet another medication that can trigger an adverse reaction when taken with D-glucosamine supplements. Taking acetaminophen and glucosamine supplements at the same time diminishes the effectiveness of both the supplement and the medication.

ALLERGIC REACTIONS

If you’re among the 7 million Americans allergic to seafood considering D-glucosamine supplements, keep in mind that they are derived from shellfish. As such, it would be best to either avoid them entirely or speak with an allergist before taking them. According to a study published by the United Kingdom’s National Health Service, D-glucosamine may affect blood glucose levels and also worsen asthma symptoms in those who are already struggling with the respiratory condition.

baking soda arthritis

Here’s how some people use baking soda to relieve arthritis pain.

FINAL THOUGHTS ON TAKING GLUSOAMINE TO EASE ARTHRITIS SYMPTOMS

All in all, glucosamine supplements are effective in resolving psoriatic arthritis, osteoarthritis, and, to a degree, rheumatoid arthritis symptoms. However, if you have concerns relative to efficacy, overall safety, or contraindications, chat with your doctor first.

8 Red Flags You Might Have a Torn Meniscus

One of the most common knee injuries individuals suffer from is a torn meniscus. These tears often result from undue strain on the knee joint, and they are a common sports injury.

Research tells us that the average age someone may encounter a meniscus tear is between the ages of 21 to 30 years of age. Also, statistics show us that these injuries occur in 61 cases out of 100,000. Although the term “torn meniscus” may seem vague, these numbers don’t specify the type.

As you age, the likelihood of degenerative tears increases. That is because the cartilage experiences wear and tear as we age. Thus, it becomes not stable enough to remain intact.

You’ll want to pay attention to these eight red flags you might have a torn meniscus.

8 Red Flags You Might Have a Torn Meniscus

There are usually symptoms associated with most injuries. The same is true of a torn meniscus.

1. Swelling and pain.

One of the first and most common signs of an injury is swelling and pain. Where there is swelling, there is pain. The inflammation of a muscle or joint will cause it to increase in size. And that is what triggers the sensation of pain.

“It’s almost an epidemic. The re-tears, that’s really the epidemic.” Dr. Timothy Kremchek, Beacon Orthopedics, Cincinnati, Ohio

2. Trouble straightening the knee.

When you are unable to hold your knee in a standard or straight position, this is a sign of a meniscus tear. A rupture of this type can cause significant problems with motion in any joint.

X-rays take images of bones, but they won’t work for showing soft tissue injuries, tendons, and ligaments.

torn meniscus

3. Feeling of an unstable joint.

One of the 8 red flags you might have a torn meniscus is the feeling that the knee is about to give way. This sensation may occur while walking anywhere, not just up and down the stairs.

Some who encounter a tear felt that the kneecap was “slipping” while walking down flights of stairs. This same feeling may occur while attempting to exercise.

“Most cheerleaders have knee problems. I had just gotten back from the doctor about two weeks before this happened with a bruised meniscus and tendonitis in my patella. A lot of the girls on the squad have irregular cartilage and torn ligaments.” Julia Allen

4. The feeling your knee is “popping.”

A tear in the meniscus may be painful, but this may also include a popping sensation. This type of feeling is shared with various kinds of injuries to cartilage in different places of the body.

You may be able to hear a popping sound, but you may also feel the popping from time to time.

“There’s a lot to be enthused about. We saw him Sunday, and yesterday started working with him, and his MRI showed he just had some superficial fibers of the MCL stretched, and all the other ligaments of his knee and his meniscus looked good. We’ll just take it day-to-day and see how he does. I think he’s got a good chance of getting ready for the game.” Bubba Tyer

acl mcl

5. Experiencing a “locked” knee.

Have you gotten up out of your chair to walk, but you feel as though your knee is locked in one place?

If you have been sitting, but stand up to walk and feel as though your knee can’t function as it should, you most likely have a torn the meniscus. The tear in this cartilage can impact how you walk and move about throughout the day.

“He hurt his meniscus during football, and he thinks it’s the same thing. I thought we were in trouble. He’s an awfully good player.” John Thatcher

6. Stiffness.

Many sports-related injuries can cause you to feel stiff as soon as they occur. Often, you may only feel pain, but stiffness may settle in when there is difficulty moving your knee.

Pain may cause you to move slower, but stiffness is the feeling that you can’t move freely. If you are experiencing stiffness, this is one of the eight red flags you might have a torn the meniscus.

“What defines us is how well we rise after falling.” Zig Ziglar

7. Aging process.

As you age, the cartilage will begin to wear down, and tearing the meniscus becomes more of a likelihood. The muscle fibers wear out, and they become more likely to tear completely.

Besides, older people may face more challenges when overcoming a torn meniscus.

8. Limitation or severe pain when moving.

Basketball players, wrestlers, and other types of athletes often have to pivot quickly when playing their sport. This quick motion can cause injury, strain, and may cause a tear in the meniscus to form.

Many tendons and ligaments are surrounding the knee joint. These are all delicate and subject to injury when playing sports.

Can A Meniscus Tear Heal on its Own?

One of the most common questions is whether or not a meniscus tear can heal on its own. The outer-lying area of the meniscus is known to have a plentiful blood supply.

When an injury occurs in this area, the meniscus will likely heal properly. Abundant blood supply is what causes healing to begin.

Surgery is not the first course of action in the case of a tear in the meniscus. When damages occur due to aging and wear and tear, they cannot be repaired.

Physical therapy starts slowly and increases over time as the individual can tolerate treatment. The therapist leads the patient through a custom-tailored regiment that improves range of motion and decreases the inflammation that triggers pain.

The doctor will offer a knee brace or a support sleeve to wear, in most cases, as a first intervention. This device can help bring stability to the knee, surrounding it like additional tendons and ligaments. They might also try stem cell injections to heal to jumpstart the healing process.

When knee pain is intolerable and physical therapy, and other treatment fails, the doctor may recommend surgery. Pain medication is not considered a long-term solution.

knee

See what happens when you massage this point on your knee.

Reducing the Likelihood of a Meniscus Tear

The meniscus is broken down into two parts, but both sides are at risk. Here are essential precautions you must take, especially when exercising or participating in athletics. Please note that you should check in with your doctor if you’re just beginning a workout routine.

1 – Stretching before exercise

Stretching out and warming up properly will reduce the likelihood of an injury. The two cushioned discs on either side of the knee provide the cushion and protection that the knee joint needs.

There are some other things you can do to reduce the likelihood of tearing your meniscus. Outside of stretching and warming up correctly, you should also consider focusing your efforts on leg exercises that will help strengthen the thighs.

2 – Don’t overdo workouts

The muscles that extend from the inner and outer thigh will both come to surround the knee cap. Strengthening those muscles, tendons, and ligaments is a great way to make your body stronger everywhere.

Another way to prevent injury to the meniscus is to rest in between workouts. Giving your body adequate time to rest in between exercises is the key to keeping your joints healthy.

Working out over and over will only put undue strain on your muscles, tendons, and ligaments, causing them to become unstable.

3 – Invest in athletic shoes

Shoes are essential for comfort and for stability when working out or playing sports. Having proper shoes with support is vital for cushioning the feet properly. Proper footwear is necessary so that there is no additional stress on the feet, which can cause extra pressure on the shins, knees, and low back.

Wearing proper shoes with excellent support, will help give your feet the cushion they need, as well as the cushion you need to protect your knee joints and meniscus.

4 – Gradually build up to more intense workouts

Last but not least, to protect your knee joints and your meniscus, do not abruptly increase the intensity of a workout.

If you are walking slowly daily, but you suddenly decide to break into sprinting, you could damage your knees. So start gradually. This gradual transition is necessary regardless of the surface you are walking or running on. Abruptly increasing your rate of speed or exercise can put you at risk for tearing tendons, ligaments, and your meniscus.

slow down and walk every day

Science reveals what happens to your body when you walk every day.

Final Thoughts: A Meniscus Tear is Fairly Common, So Know the Signs

The meniscus is prone to injury, especially with athletes. Quick and sharp movements can put athletes at risk for a tear in their meniscus.

This knee injury will cause localized pain, and it’s highly targeted to one area. Generally, it will only get worse when you are in a position that causes your knee to twist. Additionally, the injury won’t usually cause too much pain while walking at a reasonable pace, and shouldn’t cause any disruption to your sleep.

The meniscus is an essential piece of cartilage for the knee, and keeping it healthy means no surgery.

Opthamologists Share 14 Eye Conditions That Cause Blurry Vision

Your eyes allow you to see the beauty of nature and to behold the faces of your loved ones. Without your peepers, life would be boring in a dark and depressing world. If your vision has always been pristine, then you might be quite concerned when you wake up with blurry vision.

Many different things can cause your vision to be disturbed. While most of these issues are mild, some things are cause for alarm. Here are the most common reasons for blurry vision.

14 Things That May Cause Your Blurry Vision

1. High Blood Glucose Levels

Many people don’t check their blood sugar levels regularly, as there is no need to do so. However, blurred vision is one of the first signs that there is a problem in your body. When your sugar levels rise above 140 mg/dL, the body suffers damage.

For some reason, the optic nerve seems to be one that is profoundly affected by the increase of sugar in the blood. If you wake up with distorted vision, then you should check your blood sugar levels to make sure they are at an appropriate level.

blood sugar test

Science reveals how Fenugreek might help lower your blood sugar naturally.

2. Pink Eye or Conjunctivitis

Pink eye is a prevalent condition that causes your eye to be red and inflamed. Bacteria enters the eye and causes an infection that you cannot ignore. An eye infected with conjunctivitis is painful, itchy, and has the hallmark red inflammation.

This condition is highly contagious, and it can spread around a family or group of friends quickly. The inflammation affects the conjunctiva area of the eye, which can cause the vision to be blurred. There are more than three million cases of pink eye diagnosed each year in the United States, so it’s a widespread ailment.

3. Glaucoma

Glaucoma is another common condition in the US, and ophthalmologists diagnose 2.7 million cases each year. It mostly affects people over 50 years of age. Pressure builds up inside the eye and causes the optic nerve to have extreme strain. The pressure on this vital nerve causes blurred vision.

While there is no known cure for this condition, it can be alleviated through medication and surgical procedures. Vision loss with glaucoma cannot be reversed; however, there are many methods to help preserve the vision you have left.

4. Cataracts

Cataracts are small pieces of skin that grow over the lens of the eye. As this piece of skin begins to grow and cover the field of sight, blurry vision and trouble seeing are commonplace. Many people state that having a cataract is like looking through frosted glass or a foggy window.

While they still can make out the person in front of them, they will often have a hard time defining facial features. Cataracts don’t cause any permanent damage as they can easily be removed. It’s prevalent to develop these in one or both eyes as a person begins to age. The most affected people are those over 60 years of age.

5. Iritis

Iritis is an infection that develops around the ring surrounding your pupil, which is called the iris. The iris has an essential function in the eye as it filters the light in and out. When this area is affected by inflammation, then blurry vision can occur.

If Iritis is not treated promptly, it can cause severe complications, which include glaucoma and cataracts. This condition can be quite challenging to handle as the light cannot properly filter the sun; thus, sunglasses are required when going outside. Thankfully, Iritis can quickly be cleared up in a matter of days. Due to the light not filtering correctly, visual disturbances are commonplace.

6. Oxygen Deprivation

Many people sleep in their contact lenses. Though some manufacturers state that their lenses are safe for this activity, it’s always best to remove them at night. Having a thin piece of plastic over the eye for extended periods can cause dry eyes and oxygen deprivation.

Additionally, dirty contacts are known to cause inflammatory conditions like Iritis too. If you are sleeping in your contacts and waking up with blurry vision, it could be that your eye is being deprived of oxygen, and you need to remove them at night.

7. Dry Eye

Dry eye is a miserable condition that can occur for many reasons. As you age, some people cannot produce enough natural tears. Chronic dry eye is a harsh condition to deal with, but it’s easily treated with moisturizing drops.

The eye requires lubrication of all parts to function correctly, which is why a person with a dry eye condition might experience mild visual disturbances. It’s essential to see a doctor to determine the cause of this nagging medical problem. Most commonly, sinus issues are to blame.

8. Macular Degeneration

Few eye conditions are as scary as macular degeneration. The visual disturbances that come with this condition are not reversible. Though there have been great strides made in the past few years to understand and treat this condition, it still is a problematic visual problem.

Blurry vision caused by MD is scary because it’s only the start of vision loss. MD occurs when the retina wears down and disturbs the field of view. This condition is mostly age-related and occurs in people over 60 years of age, but it can happen to younger folks too.

The first methods of treatment involve vitamins, laser therapy, medications, and vision aids, but there is nothing that can replace the vision once it’s been lost. Most people don’t even realize that they have this condition until their vision is greatly disturbed.

eyes9. Detached Retina

The retina sits at the back of the eye. It takes the light filtered to the eye and turns it into images you can see. If the retina detaches from the eye, blurred vision or complete loss of sight is common.

It’s considered a medical emergency, and there are less than 200,000 cases in this country each year. Surgery is the only way to fix this condition, and time is of the essence. A retina will detach most commonly from trauma, but it can happen for many other reasons, including genetics too.

10. You Need Glasses

One of the most benign reasons for blurry vision is that you need glasses. If you can’t see far away, then you are considered nearsighted. If you can’t see up close, then you are deemed farsighted.

Vision changes occur naturally as part of the aging process, or the need for glasses can be hereditary too. It’s essential to have routine eye examinations to see if glasses are needed to avoid unnecessary eye strain.

11. Retinitis Pigmentosa

Retinitis Pigmentosa or RP is a severe genetic disease that causes blindness. The retina or light filtering part of the eye fails to function. The first signs of this condition are blurry vision or other disturbances in the visual field.

There is no cure for RP, but if it’s discovered early, then measures can be done to restore blood flow to the retina. However, this condition almost always leads to complete blindness.

12. Migraines

Migraine headaches affect the visual field by putting pressure in and around the eye area. These headaches often put a person out of commission until it passes. Though sufferers describe these as quite painful occurrences, they seldom require medical treatment.

Many people find themselves sitting in a dark room until the pain has passed. Blurry vision, flashing lights, and other auras are often the first signs that one of these headaches is starting.

migraines

13. Extreme Anxiety

Most people wouldn’t dream that their stress levels could affect their vision, but it can. When you have high anxiety, your body is in fight or flight mode. Higher than normal levels of adrenaline can affect how your eyes respond to light.

It can cause your pupils to remain dilated unnecessarily, which lets in too much light in the wrong situations. You can have blurry vision when you’re stress levels are off the charts. It’s hard to fathom that the eyes could feel such a response to stress, but this is just another reason why managing such conditions is essential.

Thankfully, this is a common problem that doesn’t cause any permanent damage.

14. Uveitis

Uveitis causes blurred vision, dryness, and inflammation of the eye. This is an auto-immune disorder that is limited to this area of the body. Though this is an uncommon condition, it can cause significant damage.

If the inflammation is in the front of the eye, then it will cause pain with light sensitivity. If the infection is in the back of the eye, then it will cause flashing lights and floaters. The most common treatment for this condition is antibiotics.

However, since it’s an auto-immune issue, a system modulator may be used for ongoing treatment.

blurry visionFinal Thoughts on Dealing With Blurry Vision

Dealing with any visual disturbances is terrifying. It’s essential to see a doctor right away at the sign of any problem. Thankfully, most of these conditions mentioned can be treated without permanent vision loss. Unfortunately, some will cause blindness that cannot be reversed. It’s essential to have an annual eye examination to identify issues that can be treated before they destroy your precious vision.

Therapist Reveals How Stroke Patients Benefit from Occupational Therapy

Occupational therapy (OTR) is vital to the individual who is recovering from a stroke. Regardless of the type of stroke, every individual who suffers from one deserves to have their dignity preserved.

This return to normalcy means getting their life back by getting the proper therapy. The goal is to help these patients learn how to do everyday tasks on their own and regain their independence.

“The secret of your success is found in your daily routine.”  ~John Maxwell

Therapist Reveals How Patients Benefit from Occupational Therapy

Post-stroke rehabilitation is critical for the individual who suffered the stroke, and for the caregiver.

Care providers must keep the patient and active (if able) during the transition from the initial 24 to 48-hour window post-stroke. However, after a 24-48 hour post-stroke period of stabilization, speech therapy, and physical therapy begins.

That might sound fast. But it’s essential to “get to work” as soon as possible after this shock to the body. That’s because already weakened muscles might continue to decline.

Several days to weeks after the stroke, patients will be ready to start occupational therapy. This time frame depends on the individual’s speed of recovery.

While physical therapists rehabilitate large muscle groups, occupational therapists address excellent motor skills. The patient needs both to return to daily life faster.

In other words, occupational therapy helps patients learn how to care for themselves as they once did.

occupational therapy

Want to learn about foods to help prevent stroke? Read here.

What activities does a stroke patient learn in occupational therapy?

An occupational therapist will examine the client’s environment to determine how their lives are impacted. That step is needed because a stroke changes life significantly for an individual. This could mean no ability to take care of themselves, speak, or read as they once did.

To name a few, some included activities addressed are as follows:

  • Brushing their hair
  • Flossing and brushing their teeth
  • Eating with utensils
  • Drinking from a cup
  • Meal preparation
  • Cleaning the house

Over time therapy will bring them back to a sense of purpose. Some stroke survivors learn how to drive for the second time, and enjoy their newfound independence.

Some more challenging activities, like doing puzzles or activities that are completed in steps are often broken down into bite-sized activities. That’s because stroke survivors often have to re-learn how to complete these types of activities in sequences. Once they have mastered each portion, they can complete the entire task.

An occupational therapist is a guide through the entire process of stroke recovery. Helping the patient practice each activity will help them memorize each portion. Over time, they re-learn muscle memory and see results.

Along with practicing these daily activities, the field of occupational therapy is about improving safety for the stroke survivor.

Some of these safety measures include:

  • Installing grab bars in the shower or near the toilet
  • Removing challenging barriers or furniture
  • Specially designed utensils
  • Moving items in the kitchen to make them more accessible

Here’s another question people often ask regarding recovery. Is occupational therapy effective for all stroke survivors?

The Efficacy of Occupational Therapy

The question that most caregivers and family members have is, “Does occupational therapy always work?”

Studies show that stroke survivors who continue with occupational therapy have long-term success. Those who do not continue with therapy tend to revert to post-stroke symptoms.

When these therapies are removed, the practice of the activity is absent. Without practice, the skill will decrease dramatically.

“Man, through the use of his hands, as they are energized by mind and will, can influence the state of his own health.” Mary Reilly OTR, EdD

occupational therapy

Learn how to release the stress from your body (hint: it helps you avoid heart disease and stroke!).

Related Benefits of Occupational Therapy

This unique therapy has many benefits directly related to helping clients carry out daily tasks. However, there are other benefits related to stroke recovery that are just as important.

One of the primary struggles stroke survivors face is depression and anxiety. Working with an occupational therapist can help to reduce these symptoms and improve overall mental health.

Additionally, when clients are learning from their therapist, they are learning to cope with life as it now is.

Some students have also experienced improvement with ADHD symptoms. This is important to note because it helps with organizational skills.

Those who have suffered from a stroke will lack skills for everyday tasks. The ability to compartmentalize projects is helpful. That ensures that stroke survivors can re-learn how to organize daily living in some capacity.

Why Makes Occupational Therapy Unique?

Most patients think of other therapies, those that address a group of large muscles, when they consider stroke recovery.

Occupational therapy is unique in that it’s an entirely holistic approach. The approach takes on human nature. In addition to training small muscle groups, it trains the brain through practice to do things it once knew.

It is also behavioral. Therapists in this field will look at how their client’s lives are affected by the massive change in their lives.

The inability to function daily on their own can induce anxiety and depression in stroke victims.

Those who were once strong and independent adults report feeling as if they reverted to living in a child’s body. The frustration is almost too much to bear at times. The solace in occupational therapy is for the client and their loved ones and their caregivers as well.

The ability of a therapist to take a peek at the client’s environment will give them clues on how they can improve their overall quality of life.

therapists adviceHow Occupational Therapy Impacts the Lives of Caregivers and Family

Loved ones and caregivers of stroke survivors will also benefit from therapy. When someone loses their ability to do everyday tasks on their own, they become more reliant on their family members and caregivers.

Occupational therapy is referred to as sensory-driven therapy. This means that those who are working with an occupational therapist will be doing activities that involve the senses.

Research conducted by Thomas Jefferson University in 2010 indicated that OTR was effective for children and teenagers. It is an evidence-based practice. This means that the research that has been conducted many times over continues to present consistent results.

Children associate this therapy by gaining a sense of accomplishment. The same study revealed that many children struggle to process information of a sensory nature. This is where OTR comes into play, and it’s evidence-based.

This therapy is tailor-made for each child.

This challenge is also true of the stroke patient. Thus, post-stroke rehabilitation works in the same fashion. What the client lost can be regained through specific practice with a therapist.

Practicing these activities which involve sensory stimuli should be tailored to each individual as their needs require.

This “practice” causes the brain to process this information. Repetition is the focus of post-stroke rehabilitation.

stroke symptomsFinal Thoughts on Occupational Therapy for Stroke Patients

Post-stroke rehabilitation is crucial after a person suffers a stroke. The first 24 to 48 hours of care set the tone for the patient’s outcome.

This is why it is important to start engaging the patient quickly. As soon as something happens, the patient’s time at the hospital will be focused on keeping a daily routine.

This routine initially begins with physical therapy and speech therapy. The journey for a stroke survivor can be lengthy, starting with about 3 to 4 weeks or more in a hospital until they enter a skilled nursing facility.

This therapist will be dedicated to helping their client re-learn how to do everyday tasks that they once did without assistance. This is an important time for both the stroke survivor and their family and caregivers to learn more about OTR and how it works, and how it will benefit everyone.

OTR is, by far, one of the most reliable forms of therapy to combine with standard conventional therapy. While it offers a more holistic approach, it is viewed from the aspect of why how their client’s lives have changed.

Many stroke survivors end up with weakness or paralysis in one of their limbs. This means that physical therapy and OTR are essential to enhance their quality of life.

An occupational therapist will look for ways to improve their client’s quality of life by helping them to carry out tasks that are essential to everyday life.

When a stroke survivor can brush their teeth, dress, and bathe or shower on their own, it will help them get their dignity back. And that is the most significant takeaway a patient gleans from occupational therapy.

15 Cauliflower Recipes To Support Your Diet Goals

Anyone who has been on a diet knows how difficult it can be. We struggle to put bad habits behind us and begin embracing a life of moderation, better food, and more activity.

Finding ways to incorporate more fruits and vegetables into our diet is one way to improve our health; it is not always easy to much on fresh fruits and veggies, however. Sometimes we could go for a heaping helping of some good old fashioned comfort food—or at least something that resembles comfort food—as we work toward our firmer physique.

Benefits of incorporating more vegetables into our diets

There are a number of body-positive changes that take place when you start adding more veggies to your plate, including:

  • Improved digestion
  • Better quality of life through fewer aches and pains
  • Improved look and feel of your skin
  • Boosted immunity
  • Less stress, better emotional state
  • Healthier pregnancy

Consider cauliflower!

This delicious cruciferous vegetable is taking the keto world by storm; used as a substitute for potatoes, bread, and even pizza crust, its mild flavor, and amazing nutrition make it a perfect backdrop for all kinds of diet-friendly recipes. If you are watching your waistline and you still want to indulge in some delicious fare, consider these amazing recipes!

cauliflower for gut health

15 Tasty Cauliflower Recipes

1. Grilled “steaks” with fresh herb sauce

This meatless meal is savory and filling–you won’t even miss your filet as you slice up this amazing meal:

Ingredients:

  • 1 large head cauliflower
  • 1 tablespoon canola or grapeseed oil
  • One tsp ground cumin
  • 1 tsp ground turmeric
  • salt and pepper
  • 1 Tbsp ground parsley
  • One Tbsp ground mint
  • 1/2 small lemon, minced and juiced
  • 1 tsp olive oil
  • A garlic clove, minced
  • 1 pinch red pepper flakes

Directions:

Preheat your grill to medium-high heat. Trim leaves off the head and remove the stalk. Set the head on your cutting board and cut it into thick steaks. Save the remaining florets for another use. Brush both sides of the steaks with oil; dust with cumin and turmeric and season with salt and pepper on both sides. Grill steaks for five minutes on each side, testing for the desired doneness. Combine parsley, mint, garlic, lemon, olive oil, and pepper flakes in a small bowl; season with salt and pepper. Serve steaks drizzled with sauce and accompanied with a beautiful green salad.

2. Fried rice

Asian food lovers, rejoice! Ricing this cruciferous veggie will fulfill your urge to indulge in your favorite Chinese. This delicious dish can be used as a side for any main dish meat:

Ingredients:

  • 2 Tbsp olive oil
  • 1 onion, chopped
  • Two cloves minced garlic
  • 1/2 cup shredded carrots
  • One red bell pepper, julienned
  • 2 cups florets
  • 1 egg
  • 1 Tbsp soy sauce
  • 2 Tbsp scallions
  • salt and pepper to taste

Directions:

Place half the florets in a bowl of a food processor and pulse for about 20-25 seconds. Don’t overcrowd the bowl, or you will get an uneven rice texture of powder and large chunks. Move the “rice” to a different bowl and repeat with remaining florets.

Heat olive oil in a large frying pan–add onions, garlic, and peppers and saute till tender. Add carrots and cook for an additional minute. Stir on soy sauce, simmer for 1-2 minutes, and then add the riced veggies back in. Saute for an additional five minutes, or until the rice becomes soft and tender.

Push the vegetables to one side of the pan, Crack the egg and scramble it into the pan, incorporating it into the vegetable mixture. Season with salt and pepper to taste, sprinkle scallions and serve with your favorite protein.

3. Gnocchi

Containing the same round, fluffy texture as regular gnocchi, this recipe will indulge your need to sauce something red or white. Delicious when sprinkled with parmesan or doused in your favorite marinara, you’ll add this to your list of dinner staples.

Ingredients:

  • Two heads florets
  • 1 egg
  • 1 cup grated mozzarella
  • 1/2 cup finely grated parmesan
  • 1/4 tsp salt
  • 1/3 cup almond flour plus more for rolling
  • Sauces or toppings of your choice

Directions:

Trim the florets, discarding any leaves and debris. Chop vegetables in a food processor until it resembles something between rice and sand. Transfer mixture to a large, clean kitchen towel, squeezing as much water out as possible. Be aggressive, for the more water you squeeze out, the better the quality of your gnocchi will be.

In a large bowl, combine egg, parmesan, mozzarella, and salt. After making sure that the rice is completely dry, add it to the cheese and egg mixture and combine.

Sprinkle on almond flour and stir to combine. The dough should pinch together when you apply pressure to it; if not, keep adding small amounts of flour until it forms a soft dough. Transfer mixture to a large piece of plastic wrap use the plastic wrap and dampened hands to roll the mixture into a log about 8 inches long. Chill in the refrigerator for at least one hour before cooking.

Bring a large pot of water to a boil; add salt to the water while heating. Shape the dough by slicing log in half lengthwise, then cutting again into 1/2 inch chunks and rolling into a gnocchi shape. If your hands become sticky, clean and sprinkle with flour.

As the water comes to a boil, test/cook one gnocchi; drop it into boiling water, stirring gently, so it doesn’t stick on the bottom of the pot. Let it cook in a gentle boil for 1-2 minutes, or until the gnocchi floats to the top of the water.

Cook the gnocchi in batches; they should fit into the bottom of the pot in a single layer before floating to the top. Keep the gnocchi warm in a 200-degree oven while you are boiling the rest. Serve hot with the topping of your choice!

4. Roasted cauliflower and quinoa salad

One of our favorite recipes, this delicious salad packs a flavorful punch. A blend of bright flavors and textures makes it perfect as a lunch or as a side to accompany a hearty meal.

Ingredients:

  • 1 large head of florets
  • 1/2 tsp kosher salt
  • 1/2 tsp freshly cracked pepper
  • garlic salt
  • 1/4 cup olive oil
  • 1 cup cooked quinoa
  • 1 cup cooked peas (just till tender)
  • 2 thinly sliced green onions
  • 1/3 cup sliced blanched almonds
  • 3 Tbsp lemon juice
  • salt to taste
  • pepper to taste

Directions:

Heat oven to 375 degrees. Line a baking tray with foil and toss florets with 1/2 tsp salt, 1/2 tsp pepper, garlic salt, and olive oil. Spread florets out on baking tray and roast for 20 minutes, stirring occasionally.

Place a dry skillet over medium-high heat. Add almonds and toast till browned and aromatic. Remove from the heat.

Combine roasted florets with the quinoa, peas, toasted almonds, sliced green onions, salt, pepper, and lemon juice. Taste and adjust seasonings as needed, adding more lemon juice if you desire. Serve warm or chilled with salad greens.

cooked food

Science explains why cooked foods are better for you than raw roods.

5. Cauliflower pizza crust

When it seems that all of our comfort foods are off-limits, this is one of those recipes that saves the day. With this crispy, flavorful option for pizza, you can load up on your favorite toppings without piling on the guilt.

Ingredients

  • 1 head florets
  • 1 clove garlic
  • An egg
  • 1/2 cup shredded parmesan cheese
  • 1/2 cup almond flour
  • 1/4 tsp salt
  • 1/4 tsp freshly ground pepper
  • 1/2 tsp dried oregano

Directions:

Preheat oven to 425 degrees. Bring a pot of salted water to a boil, add florets, and cook till tender, about 12 minutes. Drain and spread on a sheet pan to cool. While cauliflower cools, peel and mince the garlic. Mash cooled florets with a food processor or potato masher without turning it into a puree. Transfer cauliflower to a large cheesecloth and squeeze as much moisture as you can out of it. The more moisture you can get out of it, the crispier your crust is going to be.

Transfer veggie mixture to a bowl. Add garlic, egg, cheese, flour, salt, pepper, and oregano. Mix thoroughly.

Line a baking sheet with parchment paper. Place vegetable mixture onto parchment paper and spread into a 14-inch disk. Bake until golden brown and crispy on the edges; about 35 minutes. Finish with your favorite toppings and dig in!

6. Cauliflower casserole

This is one of those recipes that screams comfort food. Tender vegetable, creamy sauce, and flavorful accents make it perfect for a quiet meal at home or a festive holiday gathering.

Ingredients:

  • 1 head florets
  • 6 Tbsp butter, divided
  • 1/2 chopped red bell pepper
  • 4 green onions, thinly sliced
  • 1 Tbsp chopped parsley
  • 3 Tbsp all-purpose flour
  • 1 1/2 cups milk
  • 2 cups sharp cheddar cheese
  • salt and pepper to taste
  • 1 cup soft bread crumbs

Directions:

Heat oven to 350 degrees. Butter a 2-quart baking dish. Steam florets till tender, about 10 minutes. Set aside. In a medium saucepan, melt 4 Tbsp butter and add red bell pepper. Cook for 2-3 minutes or till tender. Add green onion and chopped parsley and cook for 3 minutes longer. Add flour and stir till blended. Gradually add milk, cooking till thickened. Add one cup of the cheese, salt, and pepper to taste; stir till cheese is melted. Combine cheese mixture with florets. Spoon into prepped baking dish and top with remaining cheese. Melt remaining 2 Tbsp butter and toss with bread crumbs; sprinkle over casserole. Bake for 30 minutes or till topping is crunchy and browned.

7. Oven-roasted buffalo “wings.”

For those of you wanting buffalo taste without all those extra calories, this is one of the best recipes for satisfying your craving. Serve with carrots, celery, and your favorite dipping sauces–you won’t even miss the original!

Ingredients:

  • 1 cup unsweetened almond milk
  • 1 cup of all-purpose flour
  • 3/4 tsp garlic powder
  • 1/4 tsp sea salt
  • 1 head florets, cut into small “bite-sized” pieces
  • 1/3 cup buffalo wing sauce
  • 2 Tbsp butter

Directions:

Heat oven to 450 degrees. In a medium-sized bowl, combine milk, flour, garlic powder, and salt, stirring till well combined. Pat florets dry with a paper towel. Coat each piece in milk mixture and place on a baking tray that has been sprayed with nonstick cooking spray.

Bake florets for 18-20 minutes. Prepare buffalo sauce by whisking together wing sauce and butter in a saucepan over low heat.

Remove florets from the oven and brush liberally with buffalo sauce. Return to the oven and bake for an additional 5-7 minutes. Cool and serve with your favorite garnishes.

cauliflower and weight watchers

Learn meal prep ideas to keep your diet on track.

8. Veggie and sausage roast with cheddar cheese

One of our favorite recipes for a hearty meal, this combination of textures and flavors, will make you forget that you are dieting. Serve with a vibrant green salad for a complete meal.

Ingredients:

  • 1 large head florets
  • 1 tsp cajun seasoning
  • 2 Tbsp chopped fresh parsley
  • 1/4 tsp freshly ground pepper
  • 1/8 tsp salt
  • 2 Tbsp olive oil, divided
  • 1 chopped medium onion
  • 12 ounces andouille sausage
  • 1 1/2 cups sharp shredded cheddar cheese

Directions:

Heat oven to 425 degrees. Grease a 2-quart baking dish with butter and a little olive oil. Toss florets with seasoning, salt, pepper, and olive oil. Set aside.

Heat 1 Tbsp olive oil in a skillet. Add onion and sausage and cook till fragrant and tender. Add this mixture to florets and drizzle with remaining olive oil; mix well.

Spoon mixture into the baking dish and bake till 30 minutes, or till florets are tender and browned. Stir once or twice during cooking time. Remove from oven, sprinkle with remaining cheese, and return to the oven till cheese melts about 5 minutes.

9. Cheesy bread

This is easily one of the most flavorful recipes for “healthy” cheese bread that exists. It is a great gluten-free option for those who love bread with a meal, and it is much healthier than its greasy counterparts.

Ingredients:

  • 1 large head florets
  • 2 large eggs
  • 3 cups shredded mozzarella, divided
  • 1/2 cup grated parmesan cheese
  • 1 tsp garlic powder
  • 1/2 tsp dried oregano
  • 1/4 tsp salt
  • 1/2 tsp ground black pepper
  • 2 Tbsp butter
  • 3 cloves minced garlic

Directions:

Preheat oven to 425 degrees. Grate florets in a food processor. Transfer mixture to a large bowl. Add eggs, 1 cup of mozzarella cheese, parmesan cheese, garlic powder, oregano, salt, and pepper. Transfer dough to a prepared baking sheet. Moisten your hands and pat into a thin, even rectangle. Ideally, it should be about 1/2 inch thick.

Bake until golden brown and dry to the touch, about 25 minutes. Melt butter in a small bowl and add minced garlic. Sprinkle remaining mozzarella cheese over the crust and place it into the oven again until the cheese has melted. Slice into small sticks and serve with your favorite marinara sauce.

10. Cheddar cauliflower cakes

Top these delicious cakes with your favorite meat, tomato sauce, sour cream, or even more cheese! They are amazing hot or cold, and they will keep you on track when you need something to munch on.

Ingredients:

  • 1 large head florets
  • 2 cups sharp shredded cheddar cheese
  • 2 large eggs, beaten
  • 1 tsp cajun or creole seasoning
  • 1/2 tsp garlic powder
  • 1/2 tsp black pepper
  • 1/4 tsp kosher salt

Directions:

Preheat oven to 400 degrees. Line a rimmed baking sheet with parchment paper. Cut florets and steam or boil them for 12-15 minutes; drain well. Place florets in the bowl of a food processor and pulse several times, until it looks riced or mashed. Place it in a large bowl and let it cool for 5-10 minutes.

Add cheese, eggs, and seasoning to floret mixture and mix well. Spread on prepared baking sheet until the mixture is at a depth of 1/2 inch. Using a cookie cutter, canning lid, or another circular ring mold, cut cakes out of the floret mixture and place on a baking sheet prepped for the oven.

Bake at 400 degrees for 25 minutes, or until they are golden brown and crispy on the edges. Remove from the oven and cool for at least ten minutes before removing from the pan. Enjoy!

11. Roasted florets with chimichurri sauce

The vibrant green color and delicious flavor of a chimichurri sauce elevate this dish to our recipes hall of fame. Serve with your favorite lean protein and a fresh greens salad for a completely delicious meal.

Ingredients:

  • 1 head florets
  • 2 Tbsp olive oil
  • salt and pepper to taste
  • 1/4 cup extra virgin olive oil
  • 1/2 cup flat-leaf parsley, washed
  • 2 cloves garlic
  • 1 Tbsp red wine vinegar
  • salt and pepper to taste
  • 1/2 tsp dried oregano
  • pinch red pepper flakes

Directions:

Preheat oven to 450 degrees and position racks in the bottom third of the oven. Place florets on a large rimmed baking sheet. Toss florets with 2 Tbsp of olive oil; sprinkle with salt and pepper. Roast until lightly browned and tender, about 30 minutes. Stir a few times during baking to ensure that they are evenly done.

While florets are roasting, put the sauce together. In a food processor, place the olive oil, parsley, garlic, onions, vinegar, salt, pepper, oregano, and red pepper flakes. Taste and adjust the seasonings as needed.

Serve florets hot with chimichurri, either drizzled on the top or on the side.

12. Bang bang cauliflower

Breaded florets and spicy sauce form the perfect combination of flavors that will tantalize your tastebuds.

Ingredients:

  • 4 cups florets
  • 2 eggs
  • 2 cups panko breadcrumbs
  • salt and pepper
  • 1 thinly sliced scallion
  • 2 Tbsp sweet chili sauce
  • 2 tsp sriracha hot sauce
  • 1/2 cup mayonnaise
  • 1/2 cup Greek yogurt
  • chopped parsley or cilantro

Directions:

Preheat oven to 425 degrees. Whisk together eggs in a small bowl, adding salt and pepper (1 tsp of each will do). Add a little water to thin out the eggs and make it easier to stick to the florets.

Dip florets in egg wash till they are coated on all sides. Drop them into another bowl filled with panic bread crumbs, toss till coated thoroughly. Place coated florets on a parchment-lined baking sheet. Spray florets with cooking spray and cook for 20 minutes, or till brown and crispy.

Whisk remaining ingredients in a bowl to make the Bang Bang sauce. When florets are done, assemble on a plate and drizzle sauce over the top, leaving some for additional dipping on the side. Sprinkle with chopped scallions.

13. Creamy mashed cauliflower and leeks

This staple side gets a little bit of a facelift with the addition of sautéed leeks. Make it even more flavorful by adding a little bit of sour cream and some chives.

Ingredients:

  • 1 large head florets
  • 1 large leek, sliced thinly
  • 3 Tbsp butter
  • 1 clove minced garlic
  • 1/4 cup heavy cream

Directions:

Chop florets coarsely and put in a medium saucepan. Cover with water and 1 tsp salt; bring to a boil. Reduce heat and simmer for 10-12 minutes, or till florets are very tender.

Clean the leeks. Cut off the root and the dark green tops and discard. Rinse under cold running water as you are cutting to remove excess sand. Continue slicing into thin strips.

Place butter in a large skillet and melt over medium heat. When the butter stops foaming, add the leeks. Reduce heat and simmer for 7-10 minutes. Add garlic and cook for 2 minutes longer.

Put drained florets and leeks in a food processor and add heavy cream. Process till smooth. Add salt and pepper to taste. Spoon into a serving dish and enjoy!

cauliflower and weight loss

Here’s a seven-day keto meal plan to kickstart your weight loss.

14. Sweet potato and floret soup

This rich, creamy soup perfect for quiet meals at home or lunch on the go. A wonderfully sweet, earthy taste satisfies and keeps you on track at the same time.

Ingredients:

  • 1 small head florets
  • 2 medium sweet potatoes, peeled and cubed
  • 2 minced garlic cloves
  • 1 large sweet onion, chopped
  • 1 large carrot, chopped
  • 2 Tbsp olive oil
  • 2 quarts vegetable stock
  • salt and pepper to taste
  • bay leaf
  • 1 Tbsp dried thyme
  • Fresh parsley or cilantro

Directions:

Prep all veggies, reserving 2 cups mini florets. Heat olive oil in a large saucepan. Add garlic, onion, and carrot and sauce till all are tender, about 8 minutes. Add sweet potatoes and large florets, vegetable stock, and three pinches of salt, as well as the bay leaf. Bring to a boil; cover and lower heat, simmer for 30 minutes.

Discard bay leaf, add thyme and remove from heat. Puree mixture in a blender in small batches until everything is smooth. Adjust seasoning to taste and add small florets, simmering for another 10 minutes or till florets are tender. Garnish with fresh parsley, cilantro, and sour cream.

15. Cauliflower and chicken casserole

This delicious, nutritious casserole is one of a kind! Whether you serve it up for your family or for a crowd of hungry guests, it is sure to please!

Ingredients:

  • 1 pound boneless chicken breasts
  • 1 Tbsp olive oil
  • 1/2 tsp salt
  • pepper to taste
  • 1/4 cup heavy cream
  • 1 head grated florets
  • 1/4 tsp onion powder
  • 2 tsp Italian seasoning
  • One Tbsp parsley
  • 1 1/2 cups cheddar cheese

Directions:

Cut chicken breasts into cubes sprinkle with salt and pepper. Heat olive oil in a large skillet and add chicken, cooking till no longer pink. Add heavy cream to deglaze the pan. Heat oven to 325 degrees, spray a 1 1/2 quart casserole dish with cooking spray. Add riced/grated veggies to the pan. Sprinkle liberally with the rest of the salt and pepper, onion powder, Italian seasoning, and parsley. Top with browned chicken and cream mixture. Sprinkle cheddar cheese over the top. Cover the casserole dish tightly with foil and bake for 20 minutes. Serve and enjoy!

non scale victoriesFinal Thoughts on Using Cauliflower to Help Reach Your Diet Goals

No matter how you serve it, no matter how you slice it, cooking with cauliflower is one of the healthiest things you can to maintain your diet and weight loss goals. Choose from this list of stellar recipes, get yourself into the kitchen, and start cooking! Bon Appetit!

Pediatrician Explains How to Transition Baby From Crib to Toddler Bed

One of the most significant milestones in an infant’s life is transitioning from the crib to a toddler bed. Most children are eager to change their entrapped space for one that is large and free. However, the process can be quite tricky for both the parent and the child.

Since the confinements of a crib are all the young one has ever known, giving up their comfort zone does not come easily. It’s the equivalent of going from a twin-size bed to a king-size in the adult world. You need to learn how to manage all that space, and your sleep will be slightly interrupted.

Thankfully, pediatricians have a few tricks to help you ensure that this transitional period isn’t as difficult as it seems.

9 Tips to Help Your Child Adjust to a Toddler Bed

1. Make Sure The Timing Is Right

Many parents try to rush getting the crib out of the house to set up an average bedroom. However, you don’t want to get into too big of a hurry. Medical experts show that the best time to transition a child from a crib to a toddler bed is between 2-3 years of age.

It isn’t until this age that the toddler is mentally capable of making such a change. If you try to make the transition too early, then it can be counterproductive. Many children will reject the new bed if the transfer happens when they are not ready, and it can take longer than usual for them to make such an adjustment.

The young one must be capable of acknowledging and accepting such a change, or it could be a complete disaster. Sure, you want to toss the baby décor and opt for something that shows their individuality, but you must be patient.

toddler habits to reveal talent

Reveal your child’s talent by developing these habits.

2. Communicate With Them About The Transition

When it comes to making significant changes that involve your baby, communication is critical. Is your child asking to be moved to a toddler bed? You want to make sure you have their input on the process.

They may be entirely against making such a change as they have formed attachments to their crib. You know that feeling when you’re on a trip, and you don’t sleep right because you’re not in your bed? Well, your toddler feels that sensation during the switch.

They may be cranky and not sleeping their best during the initial switch. However, it’s always best if you have their input on the situation. If they are eager to get a big bed, then it’s going to be less of a transition for them.

However, if they are adamant that they don’t want a new bed, then you may need to wait a bit and broach the subject again. When it’s their idea, things always go much smoother than when you’re the only one eager to adjust.

3. Get Them Involved In The Toddler Bed Buying Process

Taking a young child shopping is typically not a fun experience, but it’s essential to bring along your young one when shopping for a toddler bed. When they are involved in the selection process, it makes them more eager to accept the change. Plus, they are the one that must sleep in the bed, so let them voice an opinion.

It’s just like with foods, if they help to cook them, then they are more willing to try new offerings. So when considering bed shopping, always include their input. Don’t be surprised if they pick something that appeals to their taste and not yours.

Keep in mind that while they may choose something a little cartoonish or themed with their current likings, but it’s just a transitional bed. The toddler bed is not as significant of a purchase as a twin or full-sized bed, where they will spend many years to come.

picky eaters

Find out 18 foods that even the pickiest children will eat.

4. Make Sure They Don’t Still Need A Crib

Some children still need the confines of a crib. They need to be enclosed so that they don’t wander the house getting into mischief. If you cannot leave your young one alone for any period, even five minutes, then it may not be the right time to make a switch.

Part of being mentally ready is that they can get in and out of bed without wreaking havoc on the home. If they will get into the fridge and bust eggs on the flour, smear toothpaste on the walls, and destroy the house while you sleep, then it’s best to hold off a bit longer.

5. Establish a Bedtime Routine

Pediatricians say that bedtime routines are practical for both the parent and child. If you want your baby to sleep in their new bed, then you need to make it a part of their regular schedule. For instance, bath time follows a story while being tucked into bed.

When a child knows what to expect, they can adjust easier. Make bath time fun with bubbles, toys, and interaction with mom and dad. Also, let them pick the story for the night, or you can make up your own stories for even more engagement.

Being tucked into bed won’t be such a big chore, no matter where they are sleeping, if they have that close interaction with their parents. The story and snuggle time will mean so much to them that they could care less about the transfer to the toddler bed. Try incorporating other relaxation techniques too.

6. Incorporate White Noise

Many people leave the cribs in their room until their child is ready for a toddler bed. While that’s not the best situation, it can make switching to a new sleeping arrangement more difficult. If your baby is accustomed to having the sound of a television, radio, or dad snoring, then being in a room all alone can be hard to adjust.

The use of white noise enhances sleep in youngsters. It helps them to drown out the silence and focus on the comfort of ocean waves, the sound of a fan, or even raindrops. The little machines that can produce these sounds are very inexpensive, and it may be the thing that gets them to sleep in their toddler bed with ease.

Some experts believe that white noise also helps children who suffer from night terrors. So it’s worth investing a little bit of money to see if it’s helpful.

toddler bed transition

7. Set Firm Boundaries

Rules are set to help a child know their boundaries. When it comes to bedtime, you will need to set some guidelines. Switching to a toddler bed may give your little one an excuse to push the limits of your patience.

For instance, some families say that a child can have one drink of water and may use the restroom one time before bed. Of course, you must be flexible for times when they aren’t feeling well, or you need to make other considerations.

A child will use every excuse in the book to get out of bedtime, especially if they are not comfortable in their bed. By setting firm boundaries and using a counting system, they will know if they don’t follow the rules, then they will face the consequences. Don’t let your anger get the best of you as you will only make their fear worse.

8. Consider A Convertible Bed

Many cribs on the market can be used as a bed clear through to adulthood. These convertible cribs will turn into a toddler bed, and later to a twin size. Your child may have little need to adjust much if they have one section of the bed removed that allows them freedom.

You must consider that if your child is above 50 lbs., and they have mastered the art of climbing out of the crib, then it’s safer to put them into a toddler bed. If you continue to allow them to sleep in one that they have outgrown, then it can be dangerous.

A convertible crib is worth the investment because they accommodate the child from birth through graduation with little adjustments. It’s just one of those things that most parents wish they knew sooner.

9. Make The Whole Experience Exciting

Most babies love the thought of becoming a big boy/girl. If you are excited about the changes from crib to a toddler bed, then they will likely jump on the bandwagon. If you are sad and crying because your baby is growing up, then they may feed off that negative emotion.

Talk up the new bed like it’s the best thing on the planet. Let them pick out their bedding, selecting special pillows that will enhance their sleep. Choosing a night light and a few other things to make the room comfier will help to ease them into the transition too.

The more positive you are about the situation, the more optimistic your child will also be. Even if you must get animated and cheer at the milestone they have reached, any reinforcement from their parent will help.

parentsFinal Thoughts on the Transition From Crib to Toddler Bed

Making the change from a crib to a regular bed is not going easy on you or your child. However, it would help if you remained positive. By getting the child involved in the process of choosing the bed and comforter, then they will feel like they are part of this change. Finally, set firm boundaries and don’t make the change until they are ready.

6 Quotes from Buddha That Have the Power to Transform Your Life

One needn’t be a Buddhist to learn from the Buddha. Hindus, Jews, and even Christians study and implement some of the Buddha’s teachings. Many Christian contemplatives and historians also compare the words of Buddha and Jesus side-by-side, even writing books that point out the similarities between their discourses.

One big reason why Buddha has become universally adored is his inclusive “Come as you are!” attitude. He turned away no one. Furthermore, he demonstrated the utmost patience, even to those who insulted – and also injured – him.

Buddha also appealed (and continues to appeal) to the skeptics, never demanding devotion or blind faith. He was, as a fact, both a rationalist and a pragmatist. He encouraged people to put his teachings to the test and see for themselves. How refreshing!

Unfortunately and unnecessarily, much of modern religion tends to turn its collective nose up to the notion of empiricism; instead, requiring this illogical devotion and blind faith. This practice is a massive no-no in the Buddhist tradition.

Buddha made is clear from the get-go who he was. Not a God, but an enlightened being.

A Story About Buddha

Buddha explained this in a fascinating conversation that reportedly took place between Buddha and a man named Dona, the brahman. According to the Dona Sutta of the Pali Canon, the latter knew that something was different about the Buddha’s footprints, exclaiming, “How amazing! How astounding! These are not the footprints of a human being!”

The man approached the Buddha, who was sitting at the root of a tree and asked:

“Master, are you a [god]?”

Buddha replied, “No, brahman, I am not a [god].”

“Are you a heavenly being?”

“No…”

“…a [holy man]?”

“No…”

“…a human being?”

“No, brahman, I am not a human being.”

“Then what sort of being are you?”

“Just like a red, blue, or white lotus – born in the water, grown in the water, rising up above the water … in the same way I – born in…, grown in…, [and] having overcome the world – live [unaffected] by the world. Remember me, brahman, as ‘awakened.’ (Source)

Buddha

Read here for 31 happiness quotes by Buddha.

The Six Quotations by Buddha

(Note #2 from the writer: Pardon the interruption, again! You may notice that some of the commentaries are a bit dry. I’ve tried to make things as entertaining and applicable as possible! Enjoy!)

#1 – Know Your Mind

“Mind is the forerunner of (all good) states. Mind is chief and [states] are mind-made. If one speaks or acts with a pure mind, happiness follows as one’s shadow that never leaves.” (Dhammapada, Verse No. 2)

In both Buddhist and Western psychology, the mind is thought to be the origin of all thoughts, feelings, and perceptions. Buddha, and the spiritual Path that he founded, emphasizes the importance of this fact.

Buddhism does divert significantly from Western science (and many religions) in that Buddhists believe that everything is created in and by consciousness. Everything. As such, they do not attribute creation to a single, omnipotent being

With regards to the body, classical Buddhist thought understands that the mind arises in dependence on the body (the mind and body “are one.”) This latter stance is becoming more accepted by modern science.

As our mind is considered the source of all things, Buddhism places a heavy emphasis on the training thereof. This training involves purification, specifically, the removal of a class of mental obstructions known as the “hindrances.”

The five hindrances are as follows:

1) Sensory desire: seeking external happiness through the five senses of feeling, sight, smell, sound, and taste. (Examples: sex, drugs, fine foods, music, etc.)

2) Ill-will: holding feels of bitterness, hatred, hostility, and resentment.

3) Sloth and torpor: dullness of the mind and lethargy of the body.

4) Restlessness and worry: turbulent energy of the mind and body that produces a sense of (often subtle) irritability and anxiousness.

5) Doubt: Lacking a personal sense of conviction or trust.

Upon the uprooting of these obscurations, the mind can then show it’s “original face” – one of luminosity, clarity, and perfection!

The primary means of removing the hindrances is living a life of morality – being mindful in word and deed!

#2 – Practice mindfulness

“Let the wise man guard the mind, so difficult to detect and extremely subtle, seizing whatever it desires. A guarded mind brings happiness.” (Dhammapada, Verse No. 36)

No doubt that you’ve heard the term mindfulness once or twice. In so many words, this is what the Buddha is referring to in the 36th verse of the Dhammapada. Mindfulness not only means attending to those things in the world but also attending to within!

In other words, watching the mind!

Why watch the mind?

Well, have you ever noticed that most of the things “you” think about aren’t “yours”? What about the fact that our mind never seems to shut up? What’s this “I” that’s noticing? How can you watch yourself?

According to Buddhist thought, our “higher mind” is capable of babysitting our “lower mind” to ensure that it doesn’t cause trouble. Moreover, this “quiet watchfulness” is who you really are!

Isn’t that wonderful?

With practice, we can make a habit of observing the workings of our minds. Over time, the inherent awareness that is our true nature will torch these unhealthy thoughts, feelings, and perceptions.

mindfulness

Learn six ways to become more mindful.

#3 – Watch Your Words

“Even though a speech is composed of a thousand words, but those words are senseless, one word of sense is better; when people hear it, they become quiet.” (Dhammapada, Verse No. 100)

The sheer amount of useless chatter that we are exposed to is insane. (Just try and sit through two minutes of Real Housewives!) Even the people who are responsible for providing the news will “report” on the most stupid stuff. Such unfiltered talk affects our mental states.

In this quote, the Buddha is stating, “When there’s nothing to say, say nothing; when there is, keep it short!”

There’s simply no point to drone on about trifles. Idle talk and gossip and looked down upon in Buddhism as entirely pointless and potentially mentally harmful.

When we watch our speech and choose words wisely, people are more likely to listen. We also come across as upright and trustworthy individuals.

Buddha quotes#4 – Rid Yourself of Hatred

“We live happily indeed when we are not hating those who hate us! Among those who hate us let us dwell free from hatred!” (Dhammapada, Verse No. 197)

If you’re Christian, you probably noticed some similarities between the Buddha’s words here and those of Christ. In Matthew 5:44 (World English Bible), Jesus says, “But I tell you, love your enemies, bless those who curse you, do good to those who hate you…”

While the words are different, the meaning behind them is likely the same. Hating and loving those who return the emotion in-kind doesn’t permit the cultivation of loving-kindness or compassion. Hence, the need for holy men such as Jesus and the Buddha to set the record straight!

If you can’t “love your enemies,” at least don’t make matters worse by hating them!

#5 – Know Your Priorities!

“Health is the greatest of gifts, contentment is the finest of riches, trust is the best of relationships, nirvana is the highest happiness.” (Dhammapada, Verse No. 204)

The quite here is rather simple, but the meaning – and the potential repercussions on one’s life – are extraordinary. Let’s go line-by-line.

“Health is the greatest of gifts…” Well, who can argue with that? Without our health, we’re nothing. When the health meter hits zero, we die. The thing is that most of us don’t bear this fact in mind. We don’t practice gratitude.

“…contentment is the finest of riches…” Oh boy, do we Americans have a fundamentally-discontent mindset! The main problem: we think contentment comes from outside of us. It doesn’t, and it can’t.

“…trust is the best of relationships…” Trust is the one thing that everyone is every kind of relationship can’t do without. When it’s gone, it’s gone for good. It stands to reason, then, that maintain trust in said relationship contributes significantly to its satisfaction.

“…nirvana is the highest happiness…” In the Buddhist context, nirvana is the elimination of all greed, hatred, and delusion. Freeing the mind and contributing to everlasting bliss.

quotes about spirituality

Click image to read 41 quotes about spirituality.

#6 – Compassion is Wisdom

“Those who possess compassion and wisdom, who are just, speak the truth, and take responsibility for themselves – those the world holds dear.” (Dhammapada, Verse No. 217)

The Buddha demonstrated a near-faultless character. He was wise, patient, and, by all accounts, very compassionate.

If you reread the above quote, you’ll notice that the Buddha puts compassion and wisdom side-by-side. This is most likely not a coincidence!

The Buddhist school of thought is that a calm and concentrated mind, which produces wisdom, cannot be cultivated without warm-heartedness and compassion.

An example of this Buddhist approach to well-being can be seen today. In his speeches, His Holiness the Dalai Lama very often mentions cultivating a calm mind along with an open heart. Once again, this is likely a deliberate act. (If you’re interested, look for his commencement speeches for a frame of reference here.)

It’s also likely that the justness, honestly, and self-responsibility that the Buddha mentions in the Dhammapada are the fruits of putting compassion and wisdom at the forefront!

Skip to content