

There are about 74 million Baby Boomers currently redefining what it means to live in the golden years. This massive generation may be living the most active retirement of any generation yet! While they’re exceptional in so many ways, no one can escape the stiffness, aches and pains that come along with aging. That’s why there’s yoga.
Yoga is a fantastic way to keep joints healthy, relieve back pain, maintain flexibility and even improve balance . Joining a studio or an exercise class is also a great way to find a social community. Try working in about 30-60 minutes on the mat 1-3 times per week. You can start noticing benefits almost instantly!
Recommended Yoga Props
It’s important to be mindful of your form and respect your body’s limits. In addition to a mat, there are certain props and tools that can help you get into the poses safely. This method is Supportive Yoga, and it’s great for beginners of all ages, including baby boomers.
Here are some recommendations to help you have a successful exercise session:
Blocks
A block is a small foam block that can be used to modify certain poses when you have limited flexibility. Having two blocks is recommended. That way you’re able to maintain symmetry by having one block on each side for certain poses.
Straps
Straps are thick fabric straps that are used to help you get leverage for certain poses. We suggest getting a strap that connects back on itself with an adjustable closure that forms a circle. These types of straps can be easier to use, especially if you have any issues with grip or arthritis in your hands.
Bolster
A bolster is a small pillow that can be used to elevate your hips, align your back, or cushion your head and neck. Bolsters are a wonderful tool, especially for those who have back or hip issues.
15 Yoga Poses for Baby Boomers
Here are 15 poses or “asanas” that are perfect for Baby Boomers.
-
Legs-Up-the-Wall Pose (Viparita Karani)
Legs-Up-the-Wall Pose is an easy, effective pose for giving you energy and improving circulation. It can also help improve your flexibility over time. Here’s how to do it:
- Start in a seated position with your butt about 6-10 inches a wall sitting sideways (so the wall is on your right or left).
- Lay down on your side.
- Exhale and extend your legs straight and up against the wall in one smooth motion.
- Let your arms rest at your sides with palms facing up.
- Keep only enough tension in your legs to keep them vertical (“up the wall”).
- Stay in the position for several breaths, working up to 5-6 minutes.
You can adjust your position until you’re comfortable, but try to have your sit bones as close to the wall as you can comfortably get. You may want to use a bolster under your hips. Your back should be flat on the mat with a straight alignment from your neck down.
When it’s time to come out of the position, gently remove the bolster if you use one. Then allow your legs to slowly come down to one side. Stay in the side position for a few breaths so you don’t get lightheaded. Then gently sit up.
-
Reclining Big-Toe Pose (Supta Padangusthasana)
Reclining Big-Toe Pose stretches a good section of your posterior chain. It’s great if you have tight legs and lower back. To do Reclining Big-Toe Pose:
- Lay on your back on the mat with legs straight.
- Keep your left leg flat on the mat while you raise your straight right leg up to perpendicular.
- Use your hands to gently hold your leg at the thigh, calf, or ankle to increase the stretch. If you need to use a strap you can loop the strap on your foot and hold the other end.
- Hold for 3-5 breaths.
Once you’re finished, release the leg and repeat on the other side. This is one of those poses where a prop – the strap – can really help you. Make sure to keep your back flat on the floor and don’t curl your neck up.
-
Tree Pose (Vrksasana)
Tree Pose is a wonderful hip opener and helps you work on your balance.
- Start in a standing position with feet hip-width apart and arms at sides.
- Shift your weight to your right foot.
- Bend your left knee as you turn out at the hip to keep the knee out to the side.
- Place your left foot on your right calf or thigh, as high as you’re able. Just do not put the foot on your right knee.
- Bring your hands to prayer position in front of your chest.
- Gaze forward and slightly up, keeping your spine long and tall as you balance on your right leg.
- Hold for 3-4 breaths.
- Exhale and release the left foot to the floor.
Repeat this on both sides. If you can’t bring your foot all the way up to thigh height, don’t worry. Just do what you can.
Also, if you lose your balance, don’t worry! It’s all part of the process. Just breathe and reset.
-
Cobra Pose (Bhujangasana)
Use Cobra Pose to open the chest, abdominals, neck, low back, and even hips! This is a great restorative pose because you can go as shallow or deep into the pose as your strength and flexibility allow. Here’s how to do it:
- Lay on your stomach on the mat.
- Bend your arms at the elbows so that your palms are on the mat under each shoulder.
- Exhale and gently push up through your arms to raise your upper body off the mat while pressing your hips and legs down.
- Breathe into the pose for 3-5 breaths, feeling the breath opening and stretching your body as you hold the pose.
- Exhale and slowly lower your body back down to the mat.
This pose feels so good you may want to do it 2-3 times. Each time you’ll be able to go a little deeper into the stretch as your body opens up. You can also gently look up to add a stretch to your neck, but be careful not to strain.
-
Downward Dog (Adho Mukha Svanasana)
Downward Dog is a classic pose that works on nearly every part of the body. Note that are a baby boomers with pain or arthritis in your wrists, then you may want to skip this pose.
- Start laying on your stomach on your mat with your palms on the mat under your shoulders and your feet flexed with toes on the mat.
- Press up through your hands and hinge at your hips, keeping your legs and back straight.
- Keep your ears between your arms and make sure your neck isn’t straining.
- To release, exhale and either bend the knees to come into a 4-legged pose, step forward into a forward bend, or hinge the hips straight and lower back down onto the mat.
Once you’re in Downward Dog pose you can bend your knees one by one to stretch out your calves and work your heels toward the ground.
-
Warrior I (Virabhadrasana I)
The Warrior pose series is great for balance and opening up tight hips. Warrior I is the first pose in the series. You can come into Warrior I from a lunge position.
- Step the right foot forward and bend the knee 90-degrees.
- Turn the left heel in and keep the left leg straight with the left foot on the ground.
- Elongate the spine and square the hips forward.
- Raise the arms straight up overhead with palms facing each other.
- Hold for 3-5 breaths, then exhale and either straighten the right leg to come into Triangle pose or step back to Mountain Pose.
- Repeat on the other side.
If you want to keep the series going, transition into Warrior II…
-
Warrior II (Virabhadrasana II)
Warrior II is the next progression in the Warrior pose series. Starting from Warrior I with right foot forward:
- Keep the right knee bent and left leg straight.
- Lower the right arm toward the front and the left arm toward the back, keeping the arms straight.
- Turn your head to gaze just beyond the front fingers.
- Hold for 2-3 breaths, then release back to Warrior II
Repeat on the other side. If you lose your balance, that’s ok! Just work yourself back into the pose. You can go back to Warrior I or into Triangle Pose.
-
Triangle Pose (Trikonasana)
You can get into Triangle Pose from a standing position (Mountain Pose) or from the Warrior poses. Here’s how:
- Place your right foot about 3-4 feet in front of your left with your right foot facing forward and your left heel turned in and left foot sideways.
- Keep both legs straight.
- Facing the side of the room, raise your straight arms to shoulder height.
- Press your hips backward and shift your shoulders forward, then hinge at the hips to bend sideways.
- Bring your right hand to the inside of your right ankle (or as low as you comfortably can) while your left hand reaches for the sky.
- Turn your head to look at your left fingers to get a nice stretch in your neck.
- Hold for 3-5 breaths, then release to standing and repeat on the other side.
As with any pose, only go as far as your body will allow. As you repeat the pose over time you’ll see changes in your flexibility and strength that let you get further into the pose.
-
Cat-Cow Pose
Cat-Cow is a nice way to stretch your spine. This can be done in a pose sequence or even in bed when you wake up. Rise and shine, Baby Boomers! To do Cat-Cow Pose:
- Start on your hands and knees with hands directly below shoulders and a flat back.
- Inhale, arch your back, and gently look up. This is the “cow” part of the pose.
- As you exhale, gently round your back as you breathe into it and let your neck relax down. This is the “cat” part of the pose.
- Continue the sequence in alignment with your breath as long as you’d like.
This is a lovely breathing exercise and a nice, gentle way to stretch the spine.
-
Happy Baby Pose (Ananda Balasana)
Happy Baby Pose is named because it mimics a natural position that babies love – and Baby Boomers will too!
- Lay on your back on the mat with your spine straight.
- Bend your knees up to your chest.
- Use your fingers to grab onto the big toe on each foot.
- Keeping a hold on your toes, allow the legs to separate and your knees to come down toward the armpits.
- To release, let go of the toes and gently return your legs to the floor.
You can hold still in the position or gently rock side-to-side and straighten and bend the knees. This is a great pose to get into certain tight spots in the hips and also gently massage the low back.
-
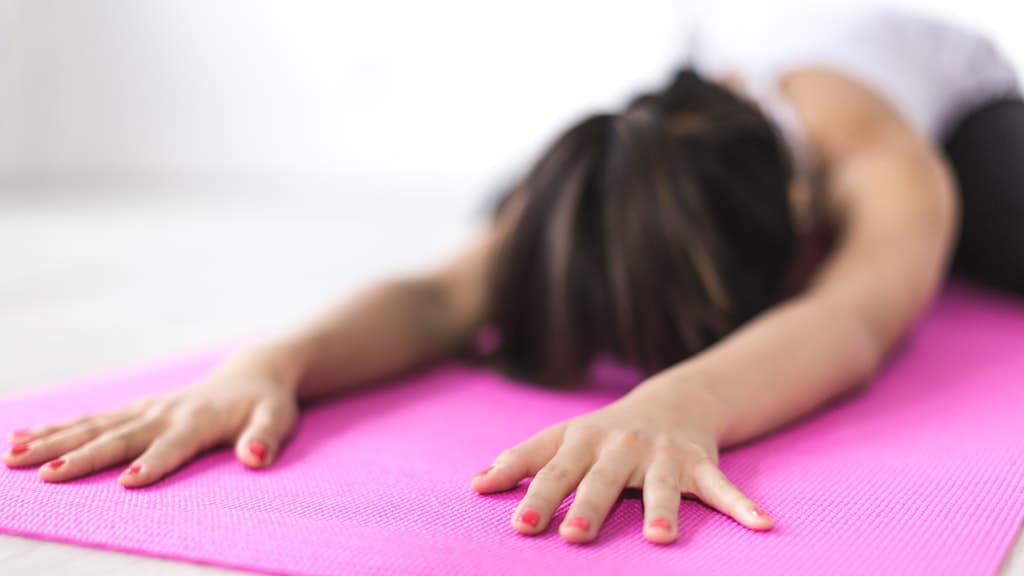
Child Pose (Balasana)
If your knees allow, Child Pose is a wonderful restorative pose to relax and stretch the back and shoulders.
- Come to a 4-legged position with knees and hands on the mat.
- Flip your toes so the tops of your feet are in contact with the mat.
- Hinge your hips back to sit on your heels and bring your forehead to the mat.
- Walk your hands as far forward as you comfortably can.
- Let your body soften into the pose and breathe naturally.
You can hold this pose for as long as you need to. If you have tight or troublesome knees, try using a block under your sit bones to elevate the hips.
-
Reclined Spinal Twist (Supta Matsyendrasana)
Reclining twists are a great way to stretch the back gently. They couldn’t be easier! Just remember to respect your body’s boundaries and only go as far as you comfortably can.
- Start laying on your back on the mat.
- Bring the right knee to the chest and hold it with your hands. Keep the left leg straight.
- Use your left hand to guide your right knee across the body.
- As you twist, release your right arm to the floor and gently look over your right shoulder.
- To release, turn your neck into a neutral position and bring the knee back to your chest then straighten it to the floor.
- Repeat on the other side.
Breathe into the twist and feel your breath create space in your ribs and spine.
-
Reclined Bound Angle Pose (Supta Baddha Konasana)
This is another amazing restorative hip opener. Use a bolster along your spine for an added boost.
- Lay on your back on the mat
- Bend your legs and bring your feet together.
- Allow your knees to gently fall to each side and bring the bottoms of your feet to touch.
- Breathe! This can be a powerful stretch, so don’t hold your breath.
- Allow your arms to fall to the sides and hold for 5-7 breaths.
- To release, use your hands to gently support your knees coming back together, then straighten the legs.
-
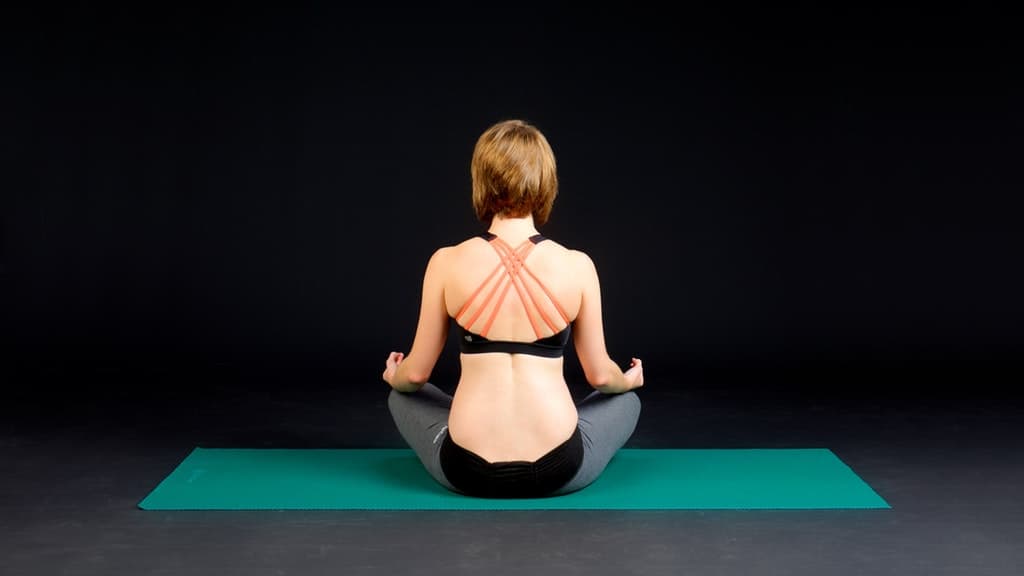
Easy Pose (Sukhasana)
Easy Pose is a fundamental for everything from starting a practice to meditation. It’s great for spinal strength and improving posture. Just be cautious if you are a baby boomer with knee or hip issues.
- Sit up straight on the mat with legs extended in front of you.
- Bend the right leg at the hip and knee to bring the shin parallel to your abdomen.
- Bend the left leg to meet the right and stack it on top, either placing the ankle on the right knee or crossing at the shins.
- Straighten the spine and sit tall.
From this basic pose, you can do place your hands on your knees, in your lap, or in prayer position depending on what you’re doing in Easy Pose.
-
Corpse Pose (Savasana)
Just about every class ends with this ultra-relaxing pose. Corpse Pose is intentionally done at the end of the pose sequence to allow the body to get back to equilibrium and give you a moment to clear your mind into full relaxation.
- Lay on your back on the mat.
- Make sure your spine and neck are in alignment.
- Place your legs into a comfortable position, then let the legs go loose and your feet fall to either side.
- Place your arms at either side with palms up.
- Close your eyes and breathe.
Enjoy Your Newfound Practice of Yoga, Baby Boomers!
We hope you enjoy these 15 yoga poses for Baby Boomers. Remember to always respect your body and use props if needed to help maintain proper form. And let us know which one of these poses is your favorite!