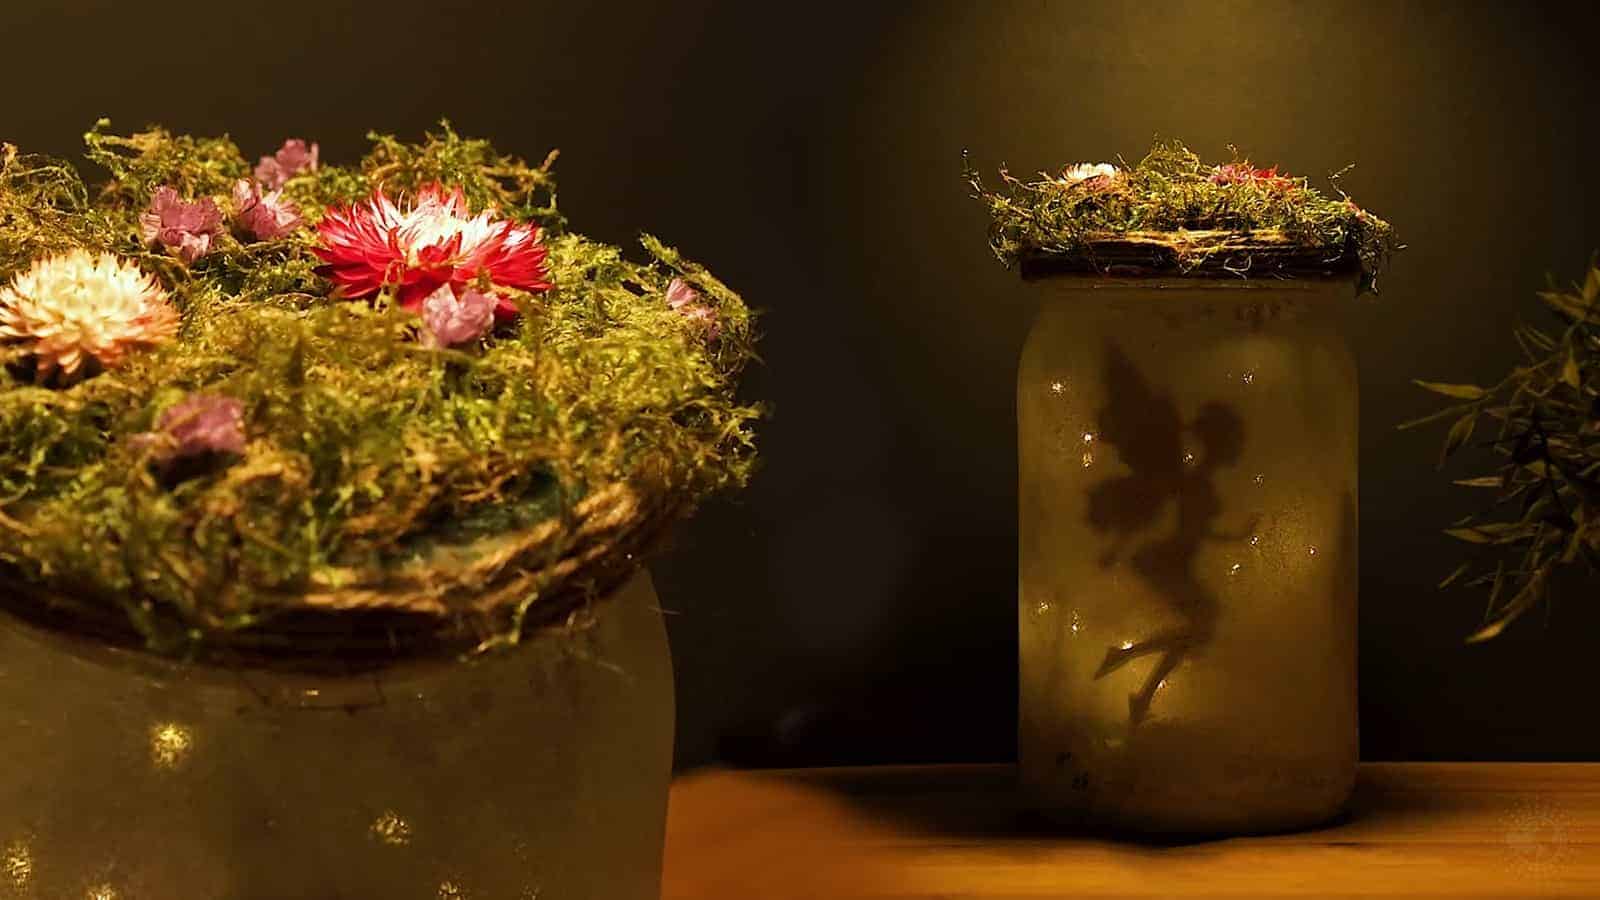


Did you know you can turn a mason jar into a piece of wall art? If you enjoy arts & crafts, you’ll love this little project! Today, we’ll show you how you can make a mason jar out of fairy lights. Whether you’re a novice or expert in craft making, we guarantee you’ll have fun with this DIY project.
Decorating your home doesn’t have to mean dropping tons of money on expensive items. Sometimes, it’s more meaningful and fulfilling to make things yourself, anyway. Crafting something with your own hands brings a sense of accomplishment and also gets the creative juices flowing. Not to mention, with all the craziness in the world, focusing your mind on an art project provides a nice escape for a bit.
Without further ado, we’ll get into this fun little mason jar light project!
How to make a mason jar out of fairy lights:
Are you ready to squeeze your creative juices? Let’s go!
 What you’ll need:
- Small bowl
- Cutting board
- Water
- Print out clip art of a mason jar
- Wood staining solution (whatever you prefer)
- Sponge
- Fairy lights
- Scissors
- Nails and hammer
- Thin piece of black rope
- A few fake flowers (or whatever decorations you’d like)
Directions:
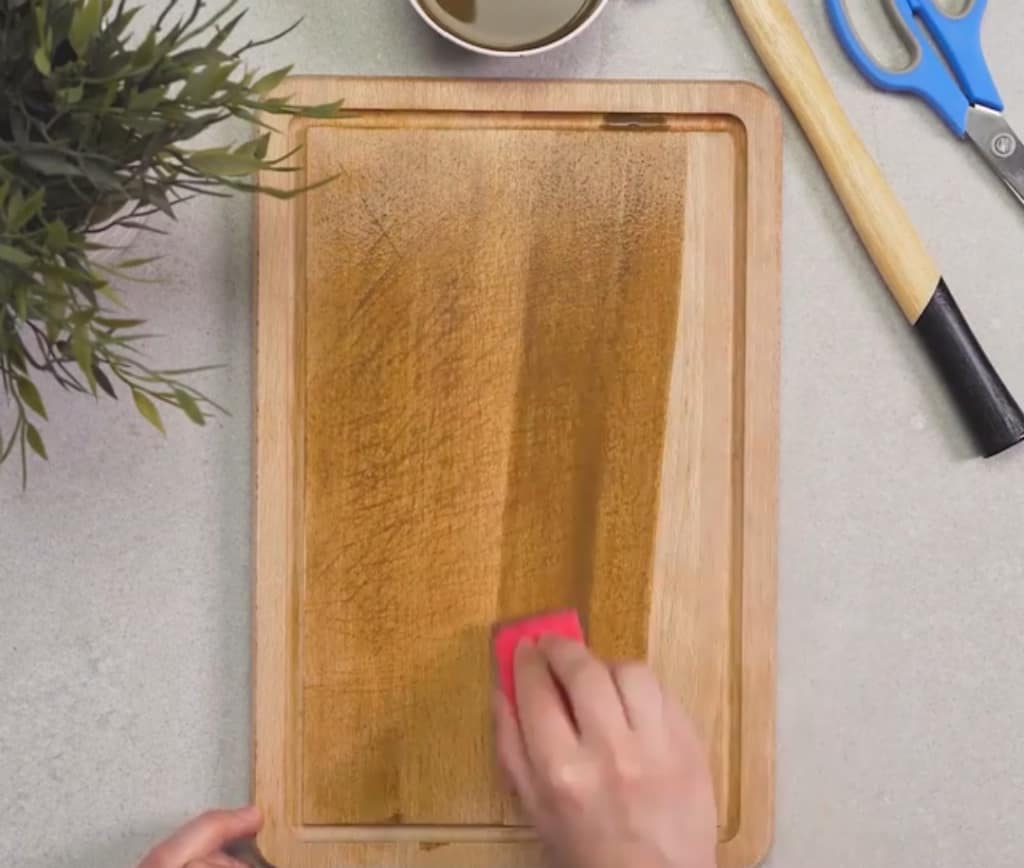
- First, fill a small bowl almost to the top with water.
- Pour in some of the wood stain into the bowl. Mix with a spoon or paint stirrer.
- Next, take a kitchen sponge and rip the rough side off. Then use scissors to cut it in half.
- Dip the sponge into the wood stain solution, and apply it to the cutting board. Use vertical movements, making sure to spread the solution thoroughly across the board.
- You may want to use several coats depending on how dark you’d like to stain the wood. Allow it to dry thoroughly before moving to the next step.
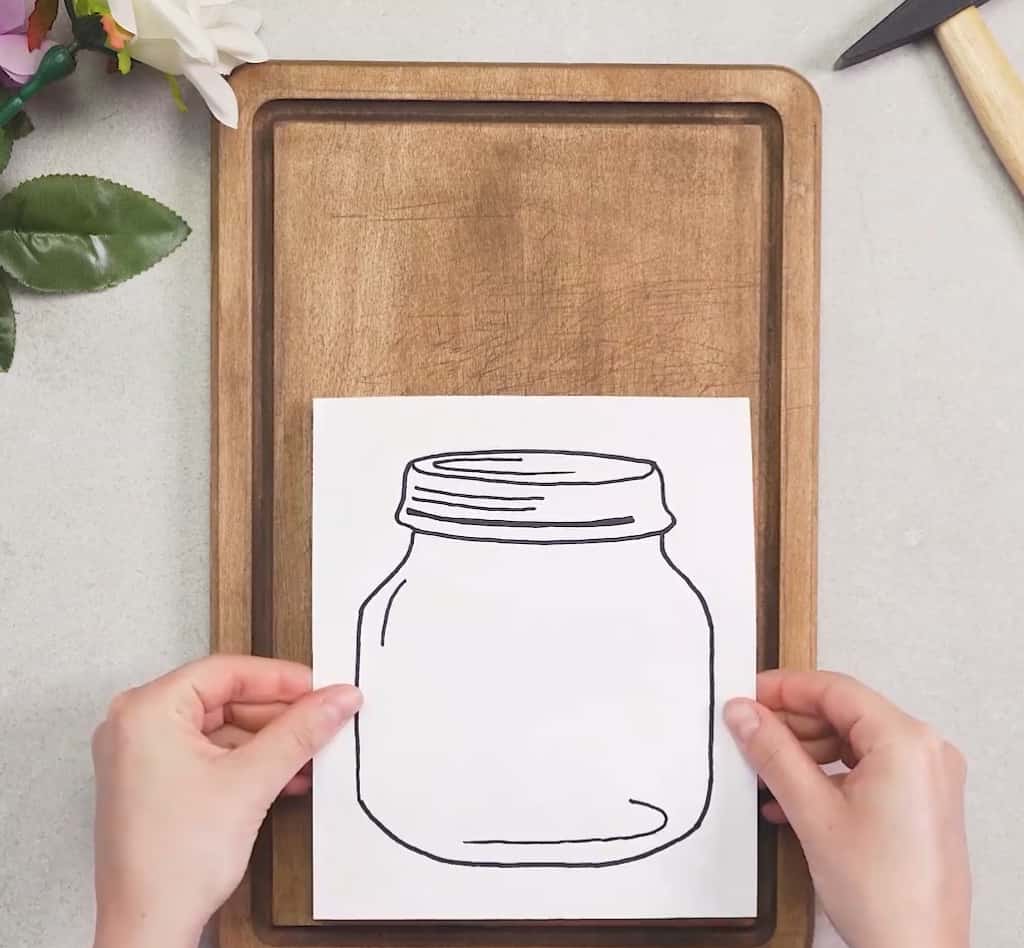
- After it’s dried completely, grab your mason jar clip art. Place it toward the bottom of the cutting board, and tape the edges down to hold it in place.
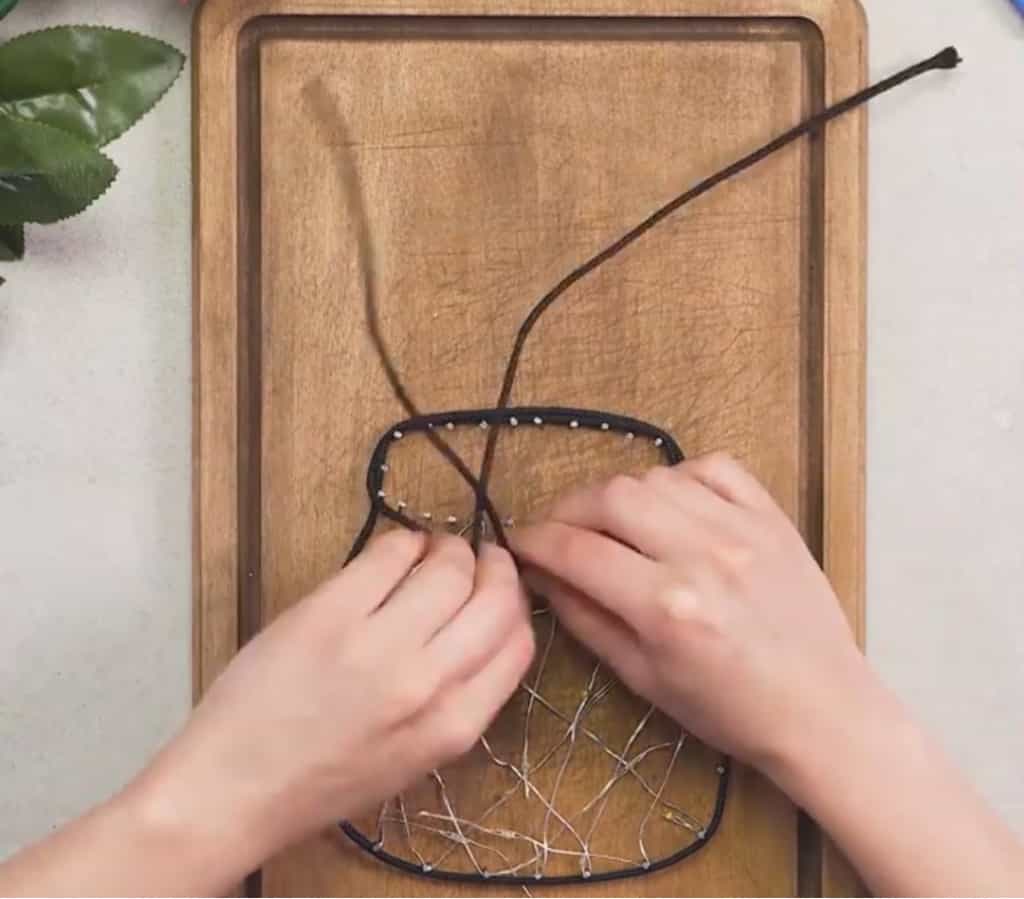
- Grab about 40-45 long, thin nails along with your hammer. Space the nails out evenly around the mason jar picture, about a quarter to half-inch apart. Hammer them into the cutting board about halfway, making sure to leave room to attach the fairy lights.
- Next, remove the tape from the picture and then take the cutout off the nails.
 Now for the fun part!
- Grab your fairy lights and criss-cross them in whatever pattern you’d like across the bottom part of the jar (everything except the lid). Obviously, you’ll want to make sure to choose a short strand of lights for this project.
- Finally, use the thin piece of rope or string to outline the mason jar. Wrap it around the bottom part first, then around the top of the lid. Next, bring it around the bottom of the lid and tie it into a bow. Cut the string if it hangs too long.
- And now for the finishing touches. We used faux flowers to decorate the mason jar art, but you can use whatever you’d like. If you go with the flowers, stick them underneath the rope and lights, all the way through to the bottom of the jar.
- Lastly, grab a piece of tape and place it on the back of the cutting board toward the bottom. This is where you’ll stick the mechanism for the fairy lights.
- Remove the tape, stick the switch for the lights on the back, and turn them on. Voila! Congratulations on creating your very own mason jar from fairy lights.
Most people use fairy lights to line the ceiling of their room and create a warm, glowing ambiance. They certainly look nice this way, but if you’re going for more subtle lighting, the mason jar idea works well. Plus, it adds a touch of art to any room, and you’ll feel better knowing you made it yourself.
Want some fairy light ideas? Here are seven fun suggestions:
- Create a faux fire. If you don’t use your fireplace but want the feel of a fire, the fairy lights make an awesome alternative. Place them in a clean fireplace, bunching them up to resemble fire. Add in tea light candles to amplify the effect.
- Add lighting to your decorations. Have a large piece of decor that you think could use some sprucing up? Wrap your fairy lights around it!
- Rest them on your headboard, or cascade them from the ceiling behind your headboard to create a magical fairyland effect.
- Please place them in a glass jar to create your own modern lamp.
- Wind them up and down a staircase to illuminate the stairs at night.
- Do you want to make your dinner table more festive but don’t want a fire hazard? Snake fairy lights around the table instead of using candles.
- Decorate your patio or garden by placing some in a mason jar. It will really light up your yard at night and create a relaxing atmosphere.
 Other ways to use mason jars:
Many people use mason jars as flower vases or even toothbrush holders! Here are a few more interesting ways to utilize them.
1. Use them as drink coasters! Take the lids off and cut out pieces of fabric to place inside. Making homemade coasters is as simple as that.
2. Create stained glass using a mason jar.
3. Use them as planters for small plants like succulents!
4. Have an extra mason jar or two lying around? Use them as spice or sugar containers.
5. In the mood to get really creative? You can even use mason jars as vanity lights!
Final thoughts on how to make a mason jar from fairy lights
There are so many arts & crafts projects to choose from out there. If you’ve been looking for your next project, consider making this mason jar from fairy lights! It only requires a few household ingredients, aside from the wood stain, and it’s easy to make. The mason jar made of lights will definitely wow your guests and add a creative flair to any room.
If you make this, please share the result with us in the comments!